Importance Of Social Media For Real Estate Professionals

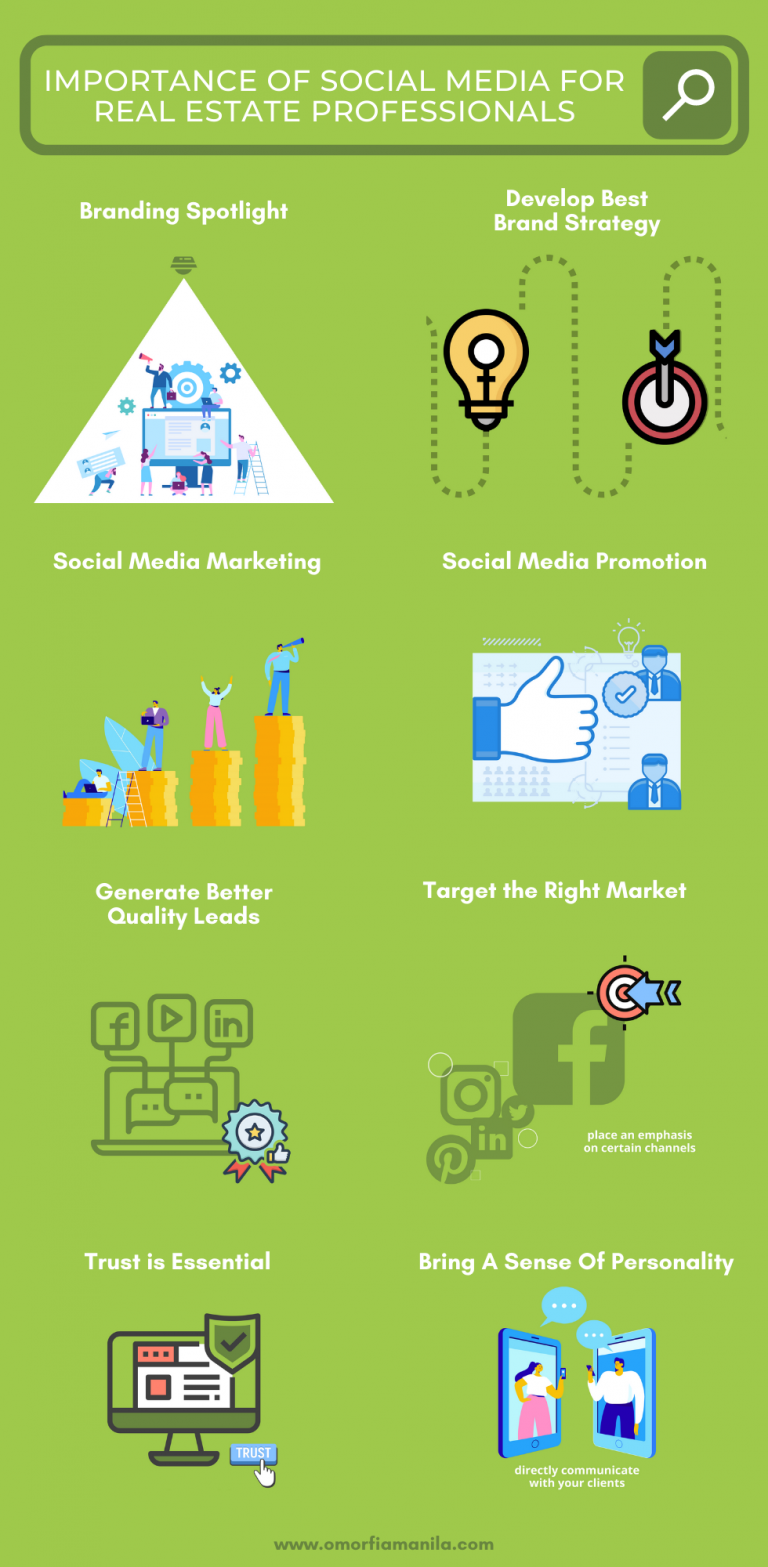
IMPORTANCE OF SOCIAL MEDIA FOR REAL ESTATE PROFESSIONALS

More than four and a half billion people use some form of social media – that is more than half of the world’s current population and each one of these people has the potential to interact with your real estate business. But you may not stand the chance of reaching them without a good social media marketing strategy.

social media users

What’s more, according to Smart Insights, in the last year alone, there was 9% increase in the amount of active social media users globally. Employing the help of real estate social media marketing companies means that you will be able to implement an effective and lucrative social media strategy that allows you to reach more people than you ever thought possible. In this article, we want to explore some of the benefits that a social media marketing company can bring to your real estate business.

active

BENEFITS OF SOCIAL MEDIA MARKETING FOR REAL ESTATE

spotlight

All too often, we see many of the same businesses dominating social media – beauty, fashion, and food are some of the major players with Instagram followers in their millions but this is not to say that real estate does not have a place on social media – it does.

Once you understand the benefit of putting your brand in the spotlight, it is not difficult to see how social media will be extremely advantageous to your real estate empire.

Expert Knowledge

target

It’s no secret that to make your mark on social media, you need experience, a good strategy, and sometimes just a little bit of luck. Although the latter cannot be provided by a social media marketing expert, experience and strategy certainly can.

As a real estate agent or real estate photographer or real estate investor, you may have an impressive knowledge in your field but that doesn’t necessarily mean that you have a solid grasp on social media – but your social media marketing company will have.

This puts you in an advantageous position since you will have somebody who can develop the best strategy for getting your brand in view and noticed by the right people. Anyone can throw out advertisements on social media but knowing how to target specific markets and get results is a whole different ball game.

Save Money

save money

OK, there may be a fee that comes with hiring a social media marketing expert, but nothing in life comes for free and the great thing is that you will be getting more bang for your buck.

Delivering paper print-outs will likely be a great waste of your time and money because when people are given leaflets like this, more often than not, they will dispose of them without a second thought. But social media can have a much greater impact meaning that your money is being well spent and you are much more likely to see a return.

Grow Your Network

promotion

Of course, making sales and finding great investments is one thing but to be truly successful in real estate, one is required to have a solid network made up of a variety of professionals – you always need a go-to for each task. The use of social media has proven time and time again to be exceptional in building your professional network.

That being said, it can be like trying to find a needle in a haystack but this is where your social media marketing team comes in. These highly skilled people will be able to promote your brand to the right people and ultimately create links to every relevant area making your business thrive,

Generate Better Quality Leads

best quality

It is reported that 47% of real estate businesses claim that their best leads come from social media campaigns and this is not a figure to be sniffed at.

claims

Whilst having a lot of leads is one thing, converting them is another and a good social media campaign can be the difference between failure and success.

Target The Right Market

emphasis

There are so many social media platforms and more are being developed every year. The big guns are still Facebook, Twitter, Instagram, and Pinterest but for business, LinkedIn is also extremely handy. However, your target market will play a part in which social media channels will benefit your business the most and a social media marketing expert will be able to determine this.

By placing an emphasis on certain channels, you can feel confident that you will get the most out of your social media campaigns and bring your brand in front of those who are likely to engage with it.

Build Brand Awareness

trust

It is highly unlikely that people will be willing to engage with a brand that they do not recognize – trust is essential, especially in an industry like real estate where huge amounts of money are exchanged. But social media for real estate can take your brand from being unknown to a household name if it is used correctly.

Even if those exposed to your brand on social media aren’t currently looking to work with you, seeing your brand in the first instance will begin to build a level of trust. Then when the time comes that they require a real estate professional – your name might spring to mind.

Bring A Sense Of Personality

communicate

All too often in the past, the business has been just that – business. But with social media, you are given new freedom which allows you to show the personality of your brand and yourself.

Whilst it is important to regularly post real estate related content, you have the opportunity to post other things. This is a great way of engaging potential clients and showing that there is a person behind the brand.

What’s more, being able to directly communicate with your clients will make them feel as though you are taking a more personal approach which can go a long way in developed solid professional relationships.

Conclusion

Real estate is a huge worldwide business and it can be easy for your business to become lost in a sea of others. But hiring a social media marketing company is a great way to get your brand out there, manage your network, and ultimately drive your business to new heights.

READ MORE


How To Edit Real Estate Photos (Step By Step Guide)

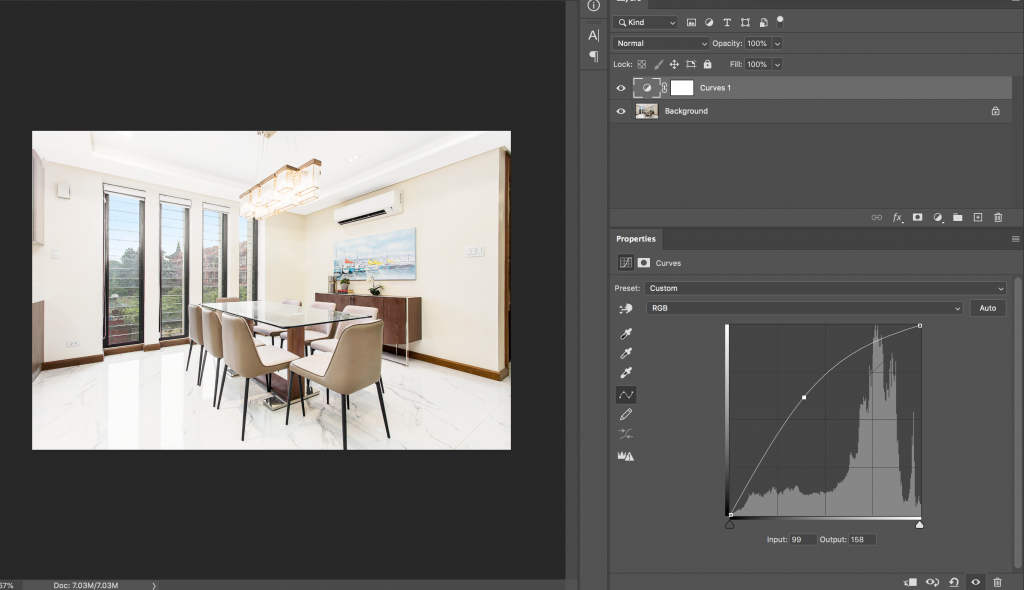
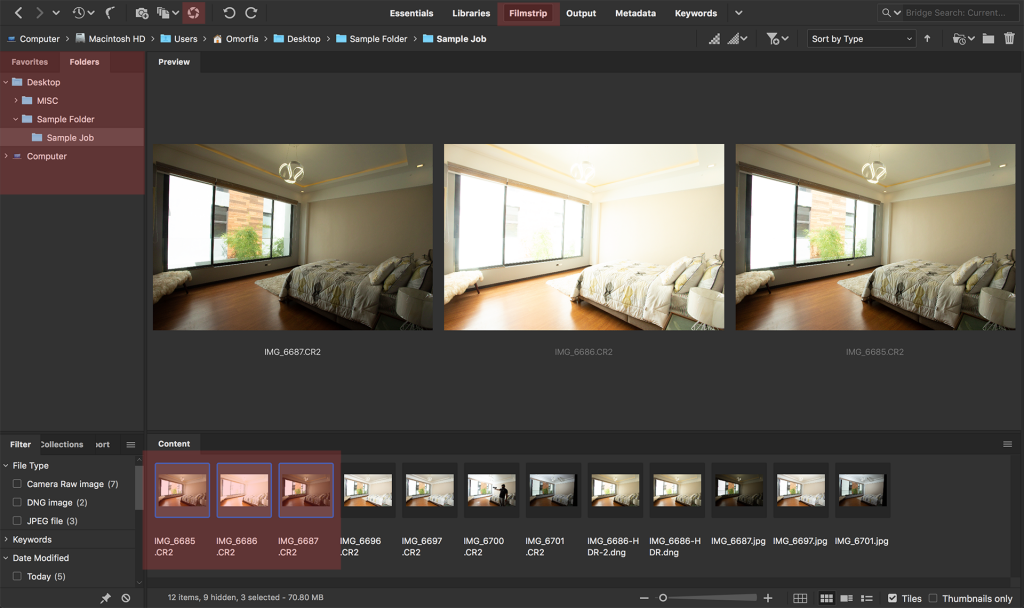
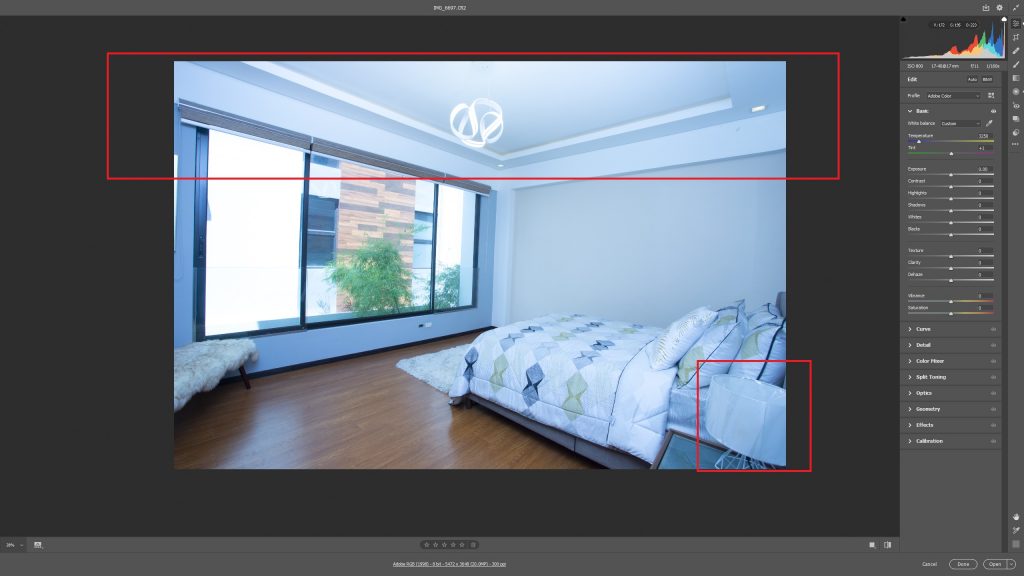
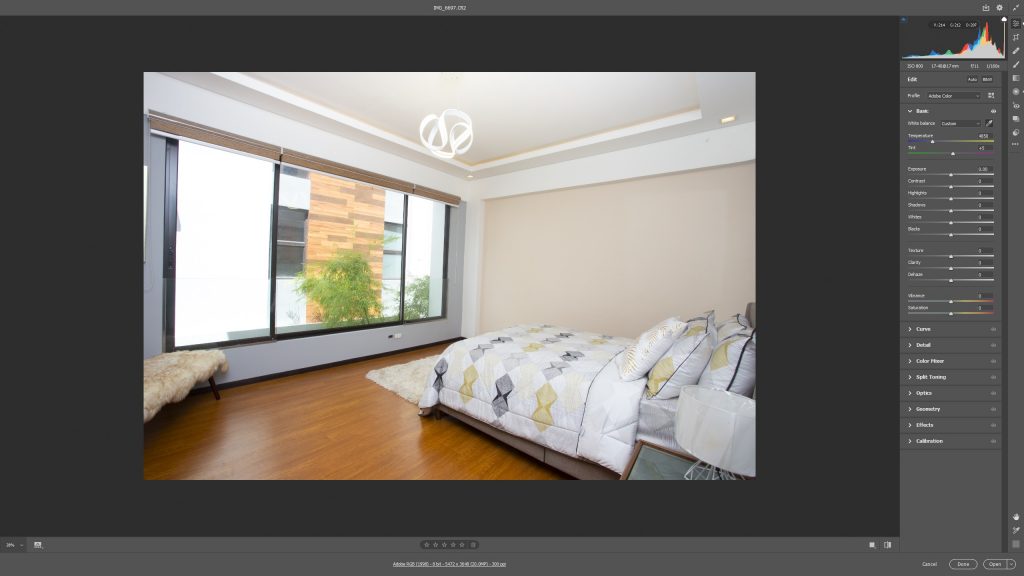
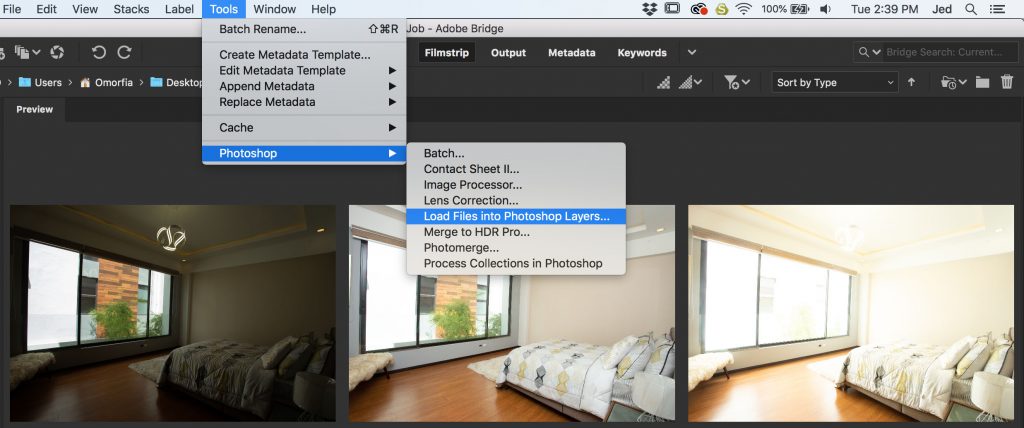
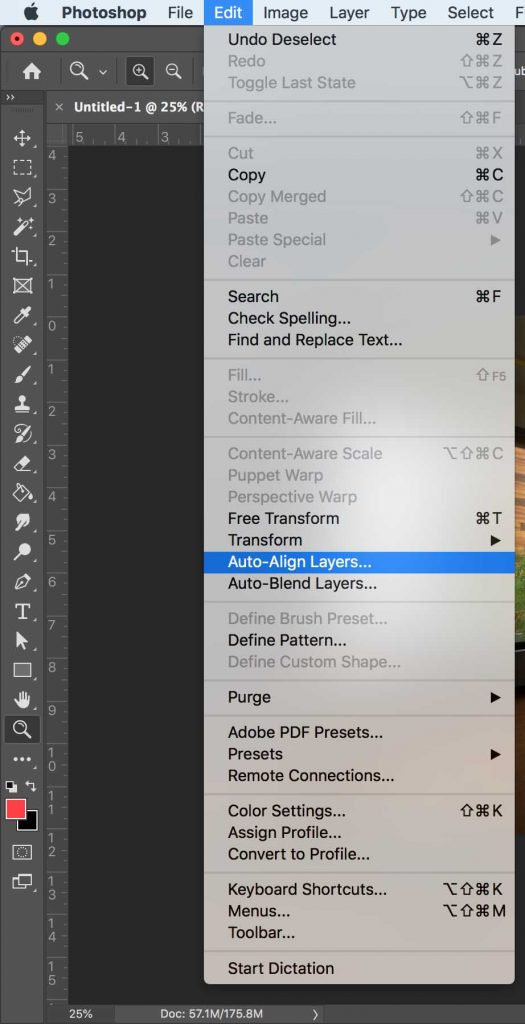
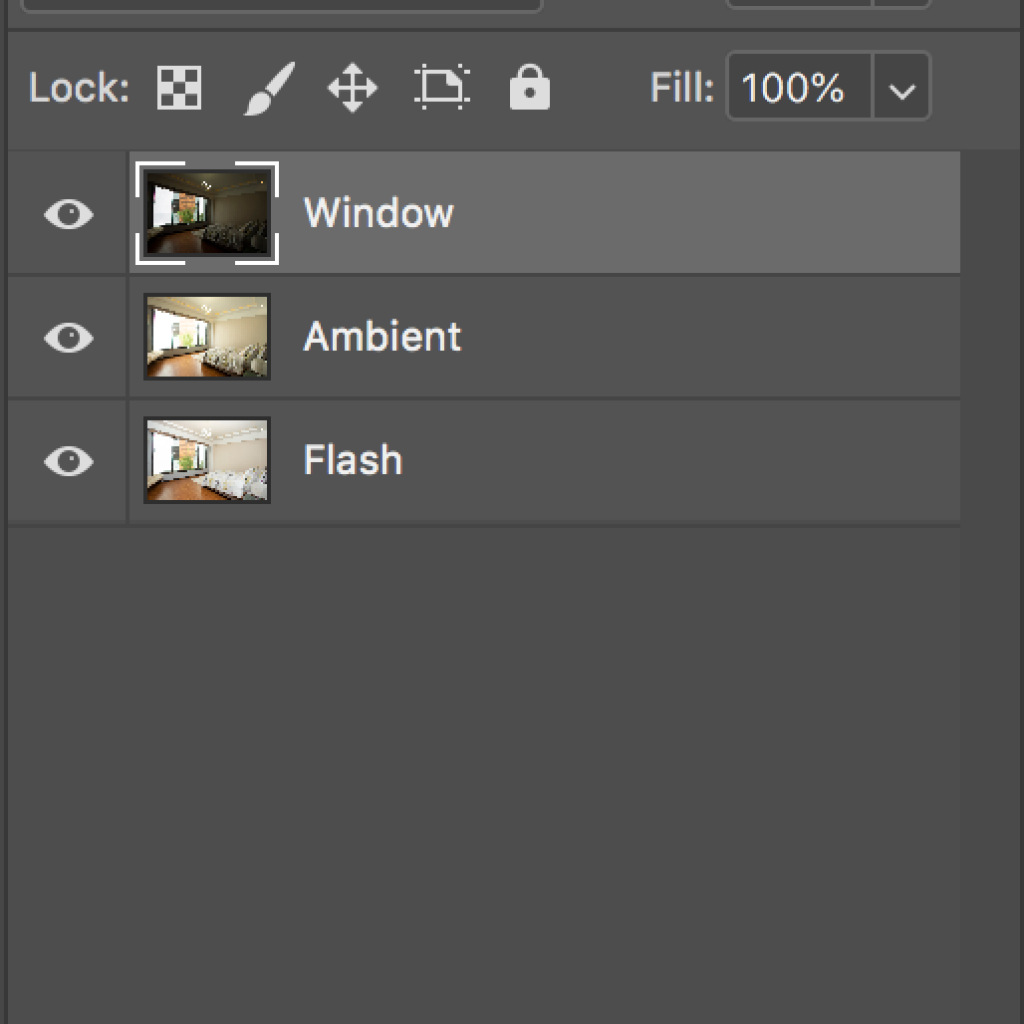
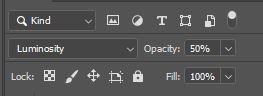
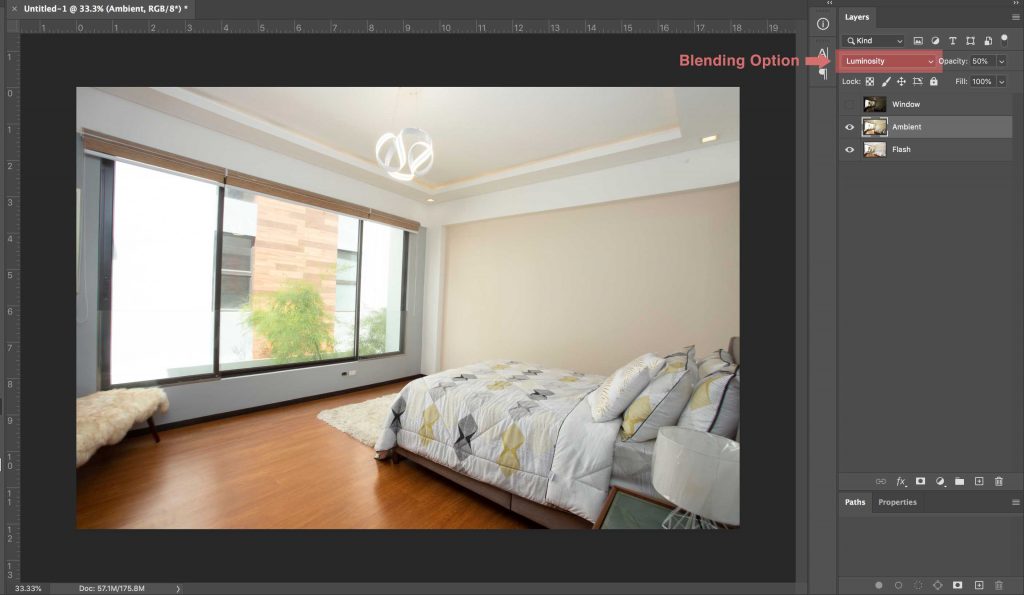
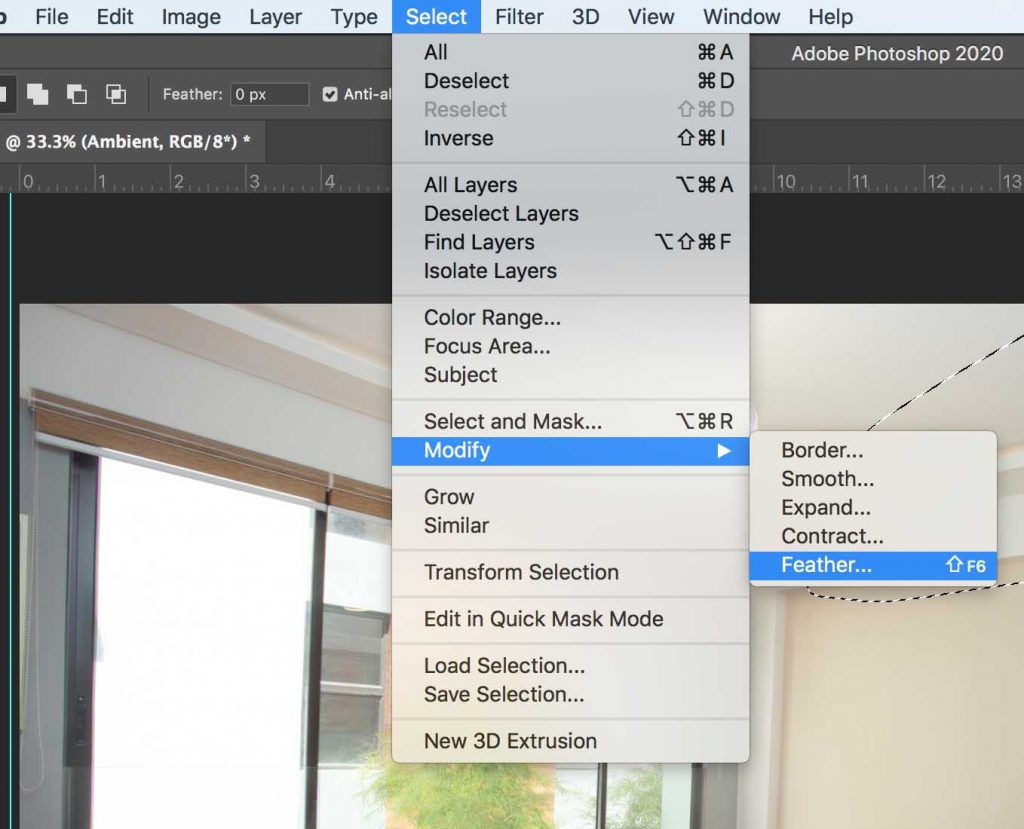
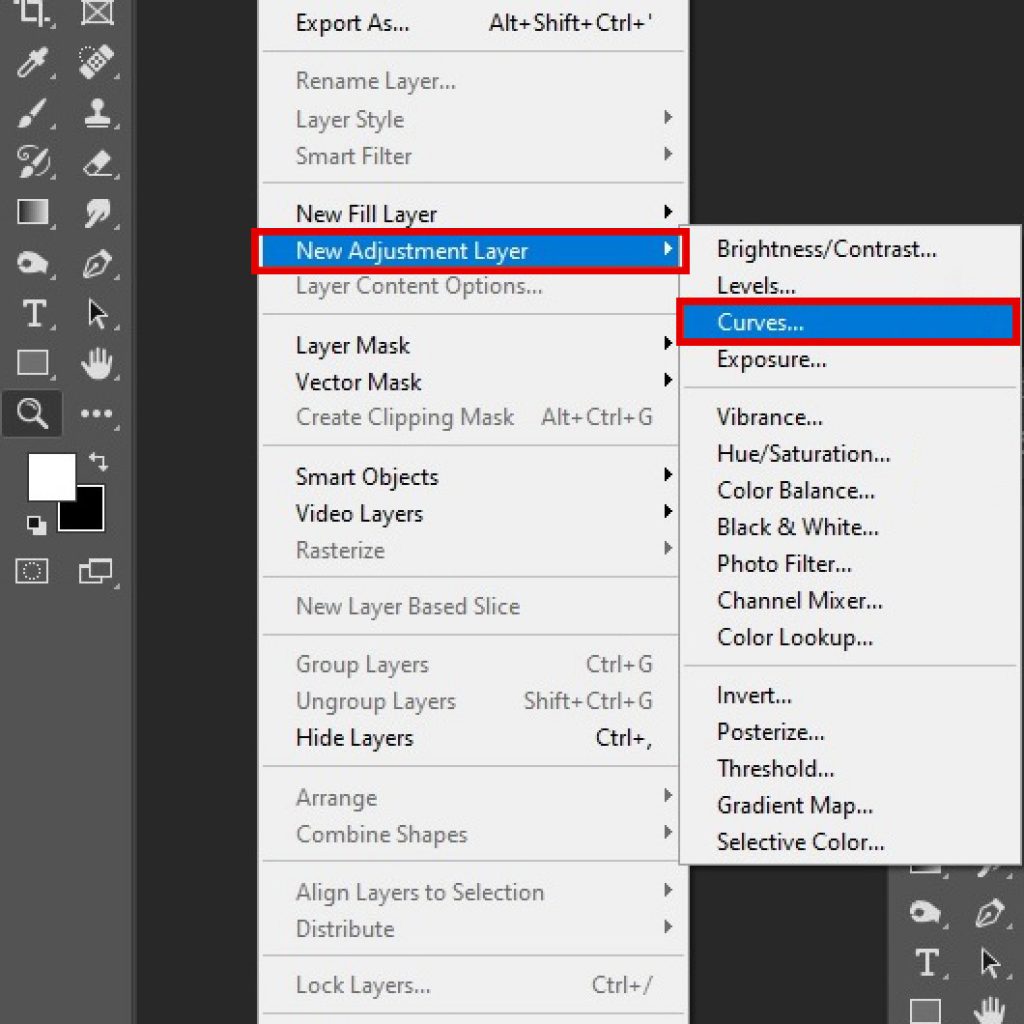
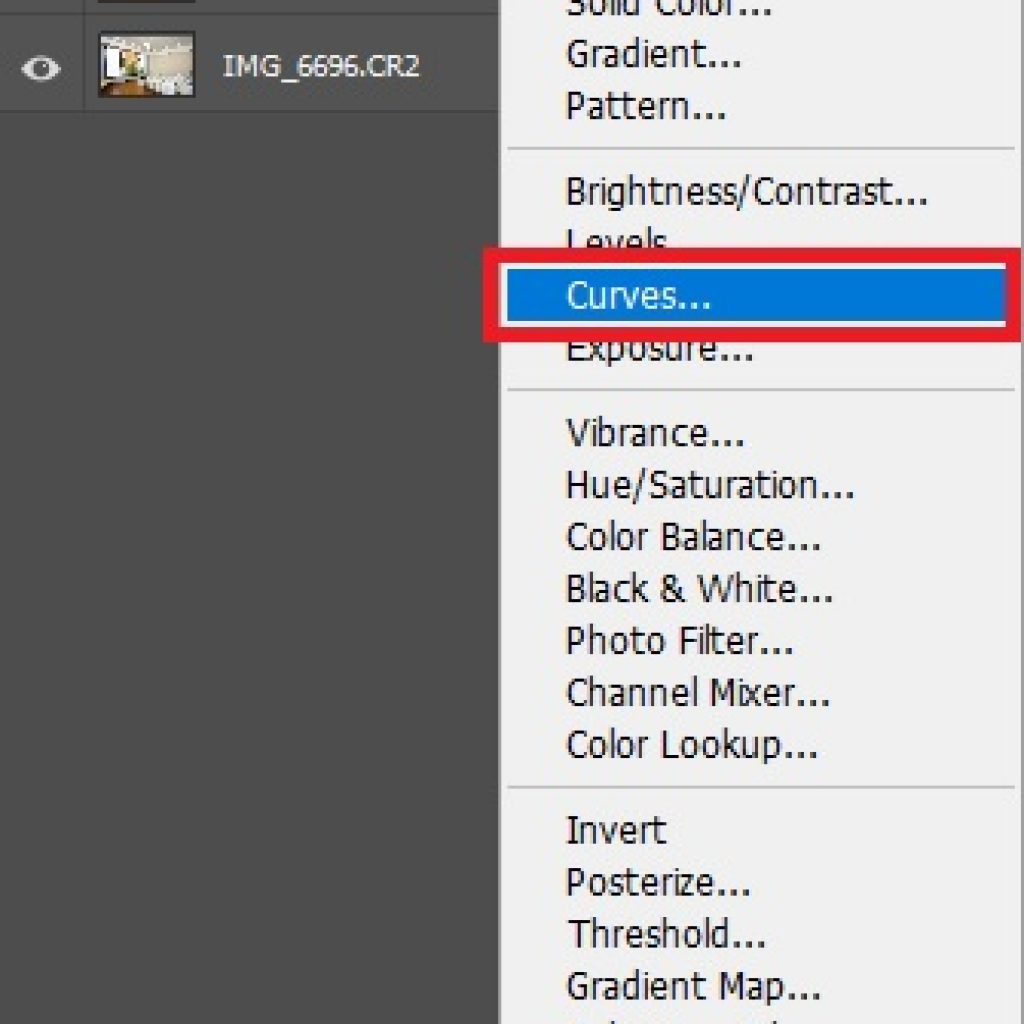
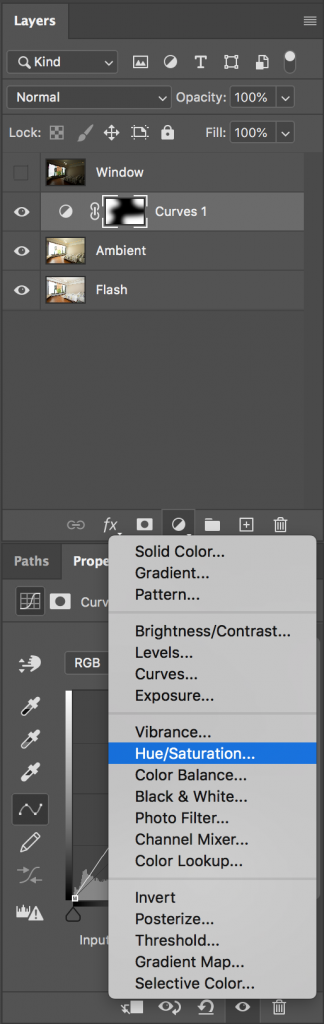
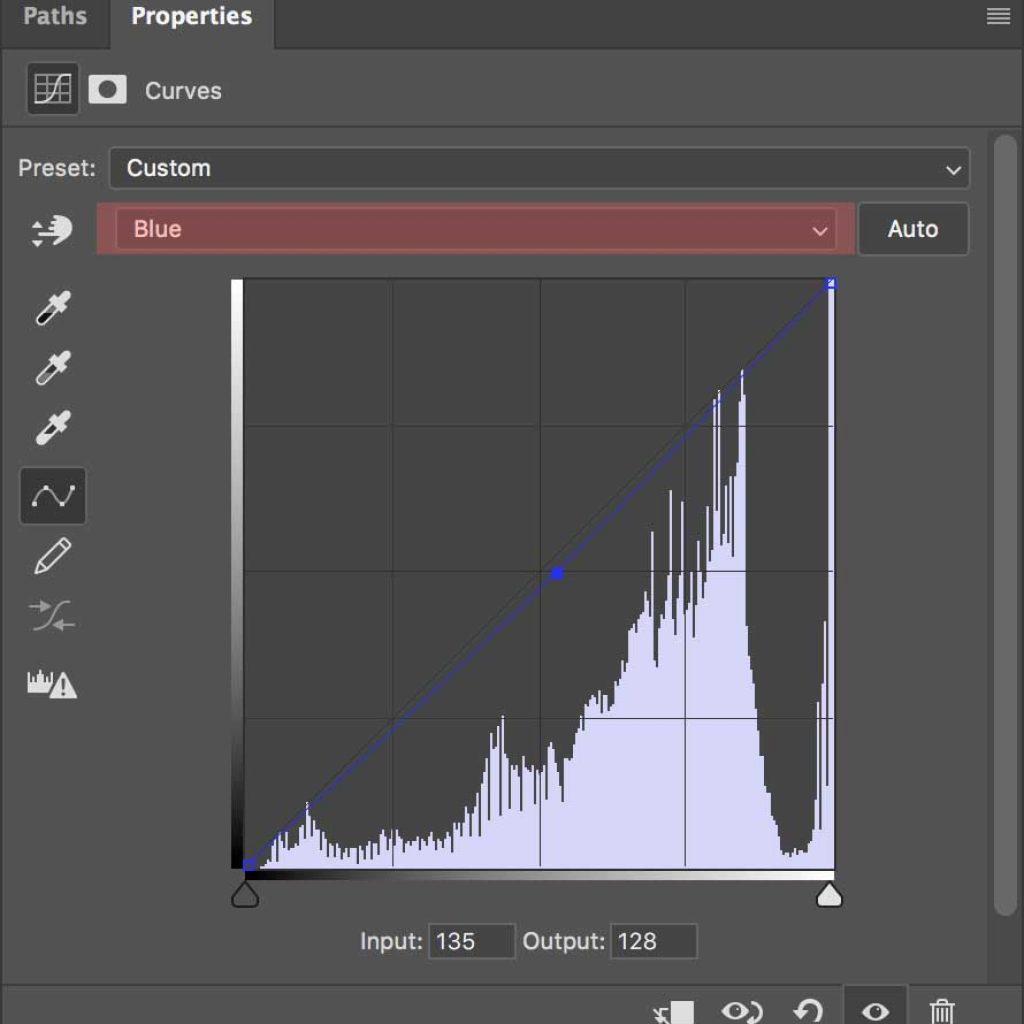
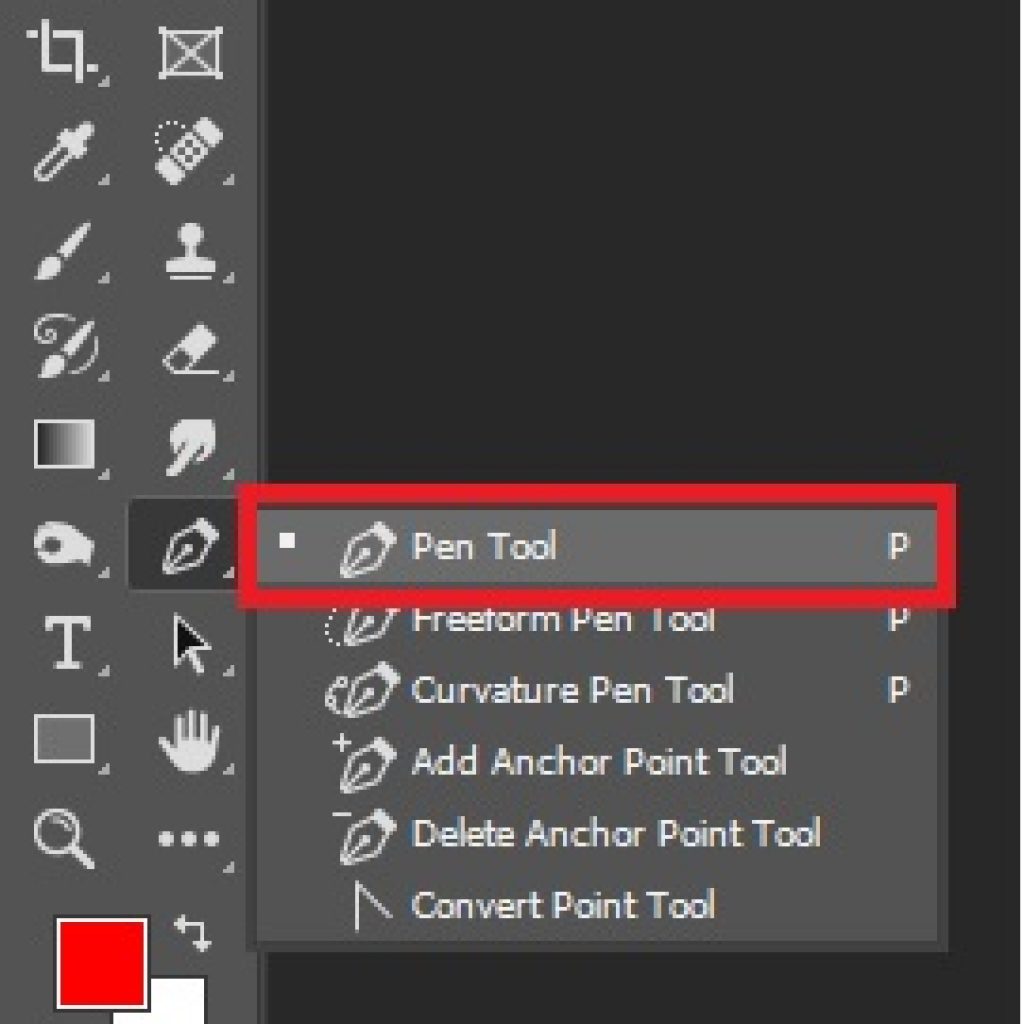
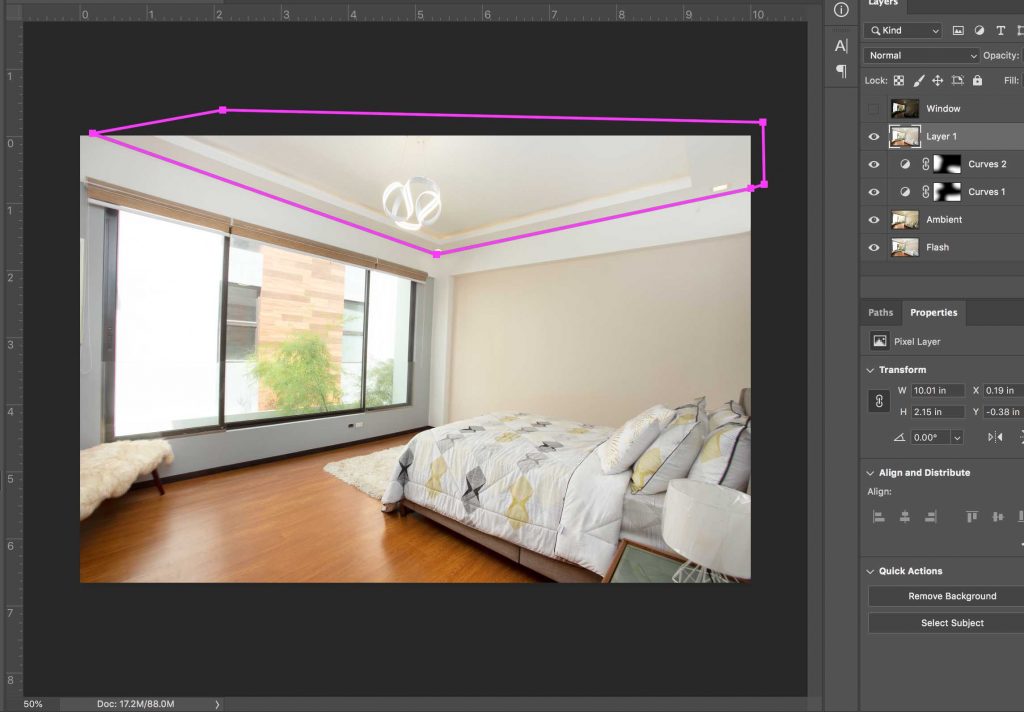
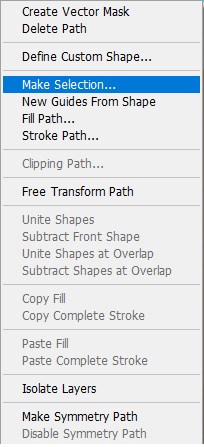
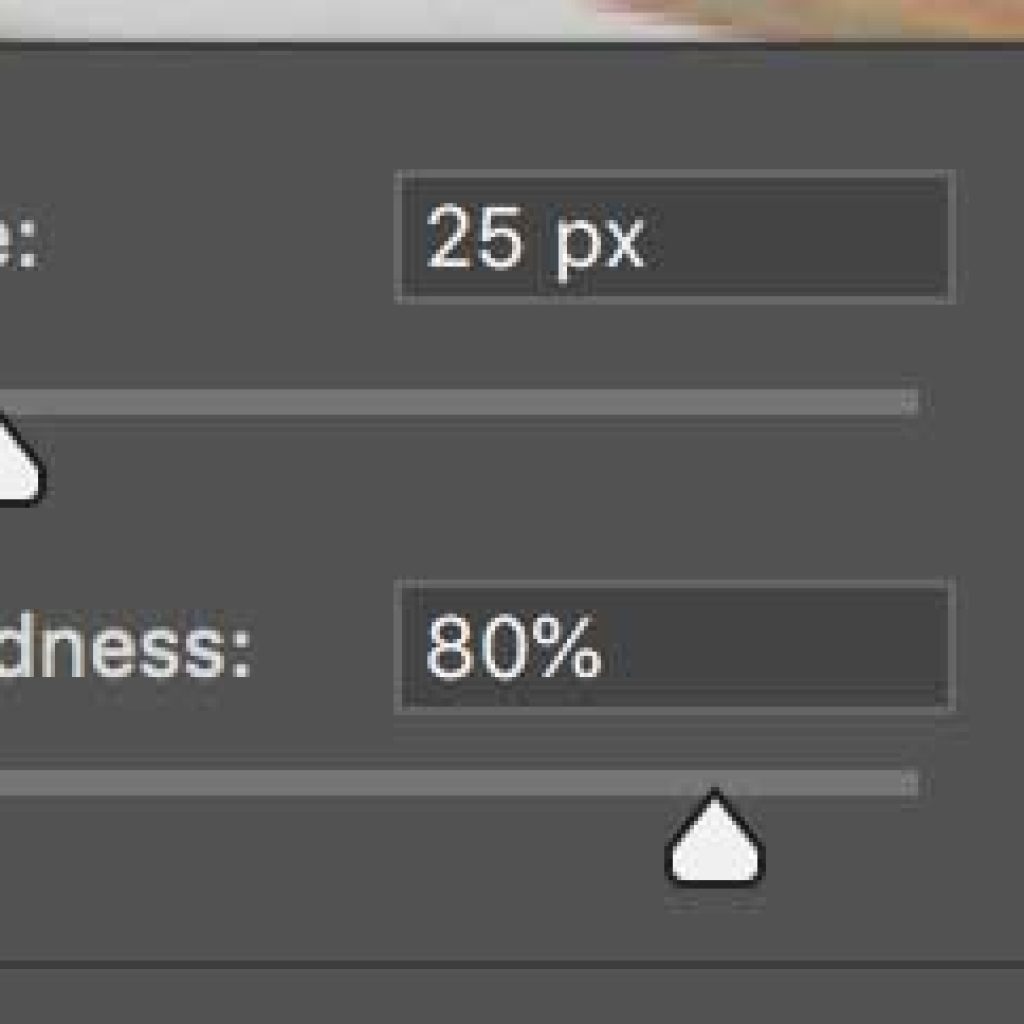
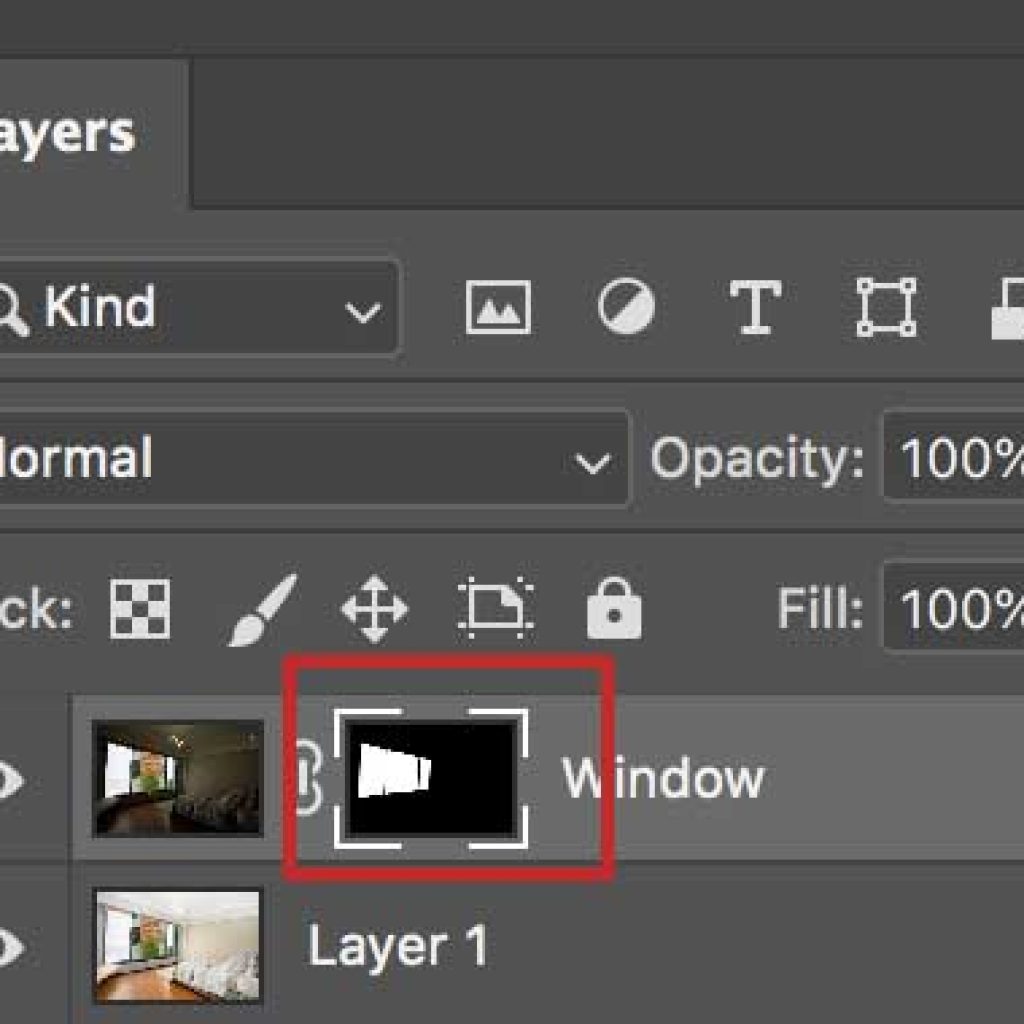
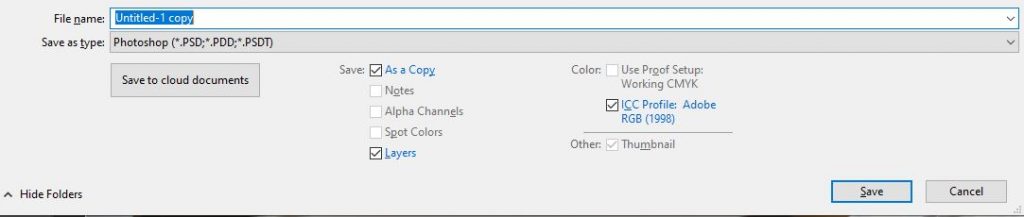
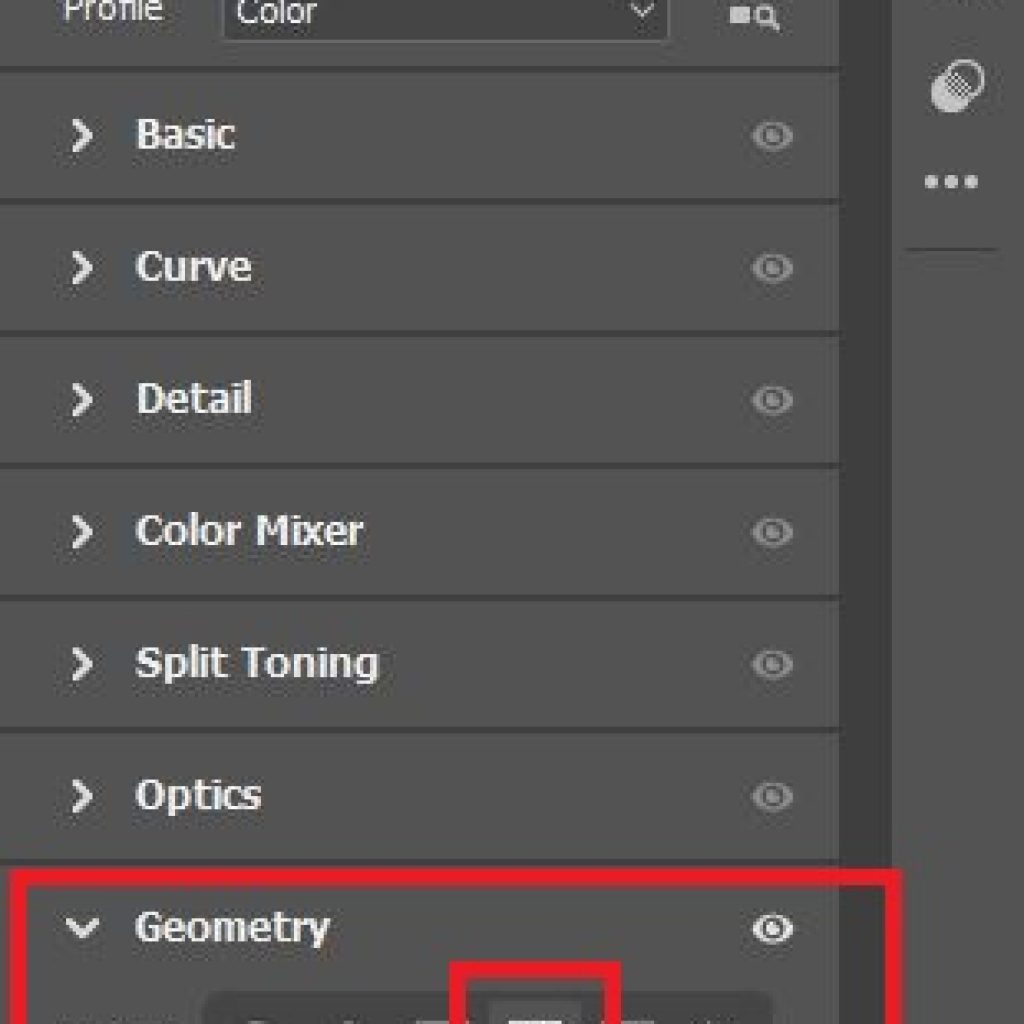
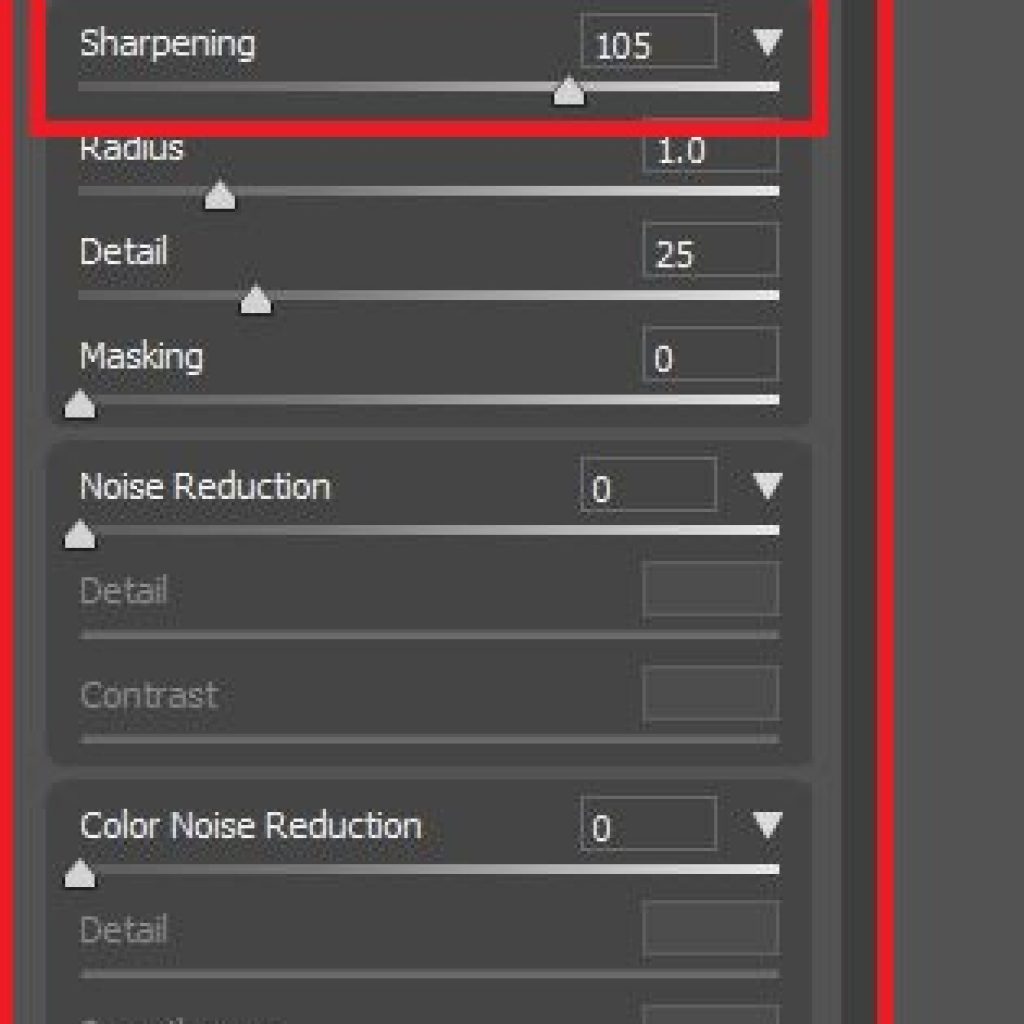
How To Edit Real Estate Photos
(Step By Step Guide)

How To Edit Real Estate Photos (Step by Step Guide)

As a photographer, I always see these questions pop up in different forums and groups.

“How do these editors make my photos look so good?”

And it follows with

“I tried editing photos on my own, but they never come out as good as the professional editors”

Well, you’re in luck because today, I’m going to unveil the secrets of the remarkable real estate photo editors hailing from the legendary hidden village of Vietnam. Okay, so technically, I’m from the Philippines, but let’s face it – the finest freelance real estate photo editors originate from Vietnam.

This is precisely how our team at Omorfia retouches each image, allowing us to serve over 100 clients worldwide.

Real Estate Photo Editing Software

Here are the software that you need.

Adobe Photoshop – This is no brainer. Suppose you like to edit your photos to its maximum potential, Photoshop is the way to go. Photoshop has the capacity to do unlimited things in real estate photo editing.

Photoshop has just released an app on an Ipad. We haven’t tested it yet, but we’ll try it soon, so stay tuned for our future blogs.

Adobe Bridge – It’s like Windows Explorer or Finder. This is where we choose the photos that we will edit. It’s somewhat like Lightroom too.

Camera Raw Plugin – Like I always say in my team. 50% of the magic of real estate photo editing comes from Camera Raw.

This is where you adjust the Brightness, Contrast, Saturation of the image.

Adobe Lightroom – We use this software to merge multiple exposures into one. This technique is much known as HDR.

You heard it right. Lightroom now has a built-in HDR plugin, so you don’t have to buy additional HDR software or plugin anymore and it’s pretty darn good too.

You can download all of these in Adobe Creative Cloud. All of these software is included in their Photography Plan for $13/month

Required Equipments for Editing Real Estate Photos

To get started on retouching real estate photos, Here are the few pieces of equipment that you need.

Laptop or Desktop

If you don’t have a computer yet, you can check out this link on what computer specs Adobe recommends.

Pen Tablet

When it comes to retouching real estate photos, time is of the essence – especially for photographers. This is why we highly recommend utilizing a pen tablet, which is significantly more efficient than using a mouse or trackpad. The one we are using is a Wacom Intuos Art

Designer 4K Monitor

While a 4K monitor may seem like an optional luxury, we learned the hard way that using a low-resolution monitor can cost you potential clients. As such, we believe that utilizing a high-resolution, true-color monitor is a must.

Monitor Calibrator

In editing real estate photos, we have to be extremely precise with the colors and brightness of each picture and a monitor calibrator is a big help to achieve that.

Most photographers recommends Data Color SpyderX Capture Pro. This is the one we are also using.

Adobe Photoshop Tools To Remember In Real Estate Photo Editing

Important Adobe Photoshop Tools To Remember

Lasso Tool (L) – is one of the ways to select parts in a photo.

Pen Tool (P) – is another way to select in Photoshop. This tool is much more efficient and has more control than the Lasso Tool.

Adjustment Layers – Under Layers Tab, this is where you can see the adjustment layers.

Curves Layer – This is where you can adjust the brightness of the photo, and add tint to it.

Hue and Saturation – From the word itself, you can increase or decrease the saturation of the image.

Levels – We are using the Levels Adjustment Layer to Adjust the whites and blacks of the photo.

Please note that these Adjustment Tools have a lot of functions. However, the ones I stated above are the functions we are using in Editing Real Estate Photos.

Okay. Let’s stop on the boring side. Let’s get started on the good stuff.

How To Edit Real Estate Photos

1 - Selection

First, to select photos that you’re going to edit, open Adobe Bridge.

We use this software because literally, it is a bridge for both your photos and your editing software (Adobe Photoshop). 

Why Adobe Bridge? Because it is neat and supports most of the video and image formats ( ex. JPG, CR2, DNG, ARW, etc. ) out there and has a user-friendly interface.

You can also select multiple images and open them at the same time.

We use it mainly for selecting multiple exposures without any hassle of opening it one by one. 

Most photographers say it’s old-school to use Adobe Bridge, but if you’re working with multiple jobs, Adobe Bridge is way more comfortable than using Lightroom.


Make sure that you’re in the Film Strip tab.

In the Folders tab, choose the folder that you would like to edit.

Now, select the exposures that you will edit. Press (CTRL/COMMAND) to select multiple photos.

Press (CTRL+R) and for the MAC user (COMMAND+R) to open Camera Raw.

You can also click this Icon to open Camera Raw.

2 - Adjustments

Once you’re in Camera Raw,

Go to Basic Panel, and you can see all the adjustment tools you can use.

1. White Balance

We strongly recommend you use the eyedropper icon or the White Balance Tool located on the right side of the panel or simply click ( I )

Click somewhere white, and in this case, for example, the objects that are whites are the ceiling and the lamp.

The first picture shows how unnatural and odd the temperature of the photo is. And with the help of this tool, you can adjust, correct some colors instantly,

It doesn’t work all the time, but frequently it is.

This tool can save you some time for blending and adjusting photos.

To learn more about the adjustments, you can check our detailed explanation here.

Real Estate Photo Editing.

After adjusting the photos click “Done”.

3 - Blending

If you only work on one exposure, you can skip this chapter. But if you’re using flambient technique here’s how to blend multiple exposures.

For Interior shots, you need 3 photos. 2 if the space doesn’t have a window.

  • Flash Exposure
  • Ambient Exposure
  • Window Exposure

Flash

Ambient

Window

Select all the photos you need in Adobe Bridge

Go to Tools Tab

Choose Photoshop

And select Load Files into Photoshop Layers.

Next step is to align the layers.

You need to do is to select all the layers. (Ctrl/Command+A)

Then go to Edit Tab

And select Auto-Align Layers.

The reason for this is that not all the photos are perfectly shot in one same angle,
some are tilted and will result in a distorted or blurry image if you blend it.

Just like the example below.

unaligned photoshop

Quick Tip: Use your tripod and place it in a stable position. And it is smart to use a remote app to control your camera for a more stable shot.

We can now proceed to the next step, which is blending.

Here, we need your Flash and Ambient exposures.

Make sure that your Background layer(Bottom Layer) is your Flash exposure and Middle Layer is Ambient exposure

layers photoshop

Let’s turn off the Window Exposure for now by clicking the Eye Icon.

Select the Ambient Layer and decrease the Opacity to 50%.

And set the blending mode from Normal to Luminosity.

luminosity blend mode photoshop
The result will give you a more balanced photo in terms of color and its brightness. It will also lessen all the hard flashes and hard shadows.

4. Whiten Dark Areas

This is where we are going to use the Lasso Tool (L)

We use this tool to even out all the dark parts in the photo.

As you can see in this photo the dark part is in the bottom right corner

and some parts in the left corner and upper right corner needs enhancement too

Select it by dragging your cursor on those areas. To add selection just hold (SHIFT) and then freely select the other dark part.

After you select all the parts that need to be enhanced or brightened, you need to put some Feather Radius in it.

and to do that, just go to Select Tab

Choose Modify

and then select Feather or just press (SHIFT+F6) for both PC and MAC.

Add Feather Radius depending on the photo or file size. We usually use 100 – 300 px feather radius.

Make sure that you don’t skip this method and proceed to the next process because it will end up like this.

And now we will lighten all the selected parts using Curves Tool, and there are 2 ways to access this tool

First is to

Go to Layer Tab

Choose New Adjustment Layer

Select Curves.

And the other which is the easy one.

Click the Circle Icon below the Layer Window

Choose Curves.

After clicking the Curves Layer, a Layer “Curves 1” will appear.

Click the line in the middle and drag it up a little to lighten up the selected area.

The higher the curves the brighter the selected part gets and vice versa. So make sure you don’t overdo it.

Adjust the curves accordingly.

4. Remove Color Casts

In this process, we are going to remove color casts. Most of them are in the form of a blue tint.

This is pretty common in real estate photos.

Let’s push the saturation up so we can see it better.

Again, go the the Create New Adjustment Layer and choose Hue/Saturation

As you can see there are some blue color casts in the left part of the image and some on the bed.

And to that, we need to use the Lasso Tool (L) to select all blue casts.

After selecting, put some Feather Radius. 100-300 px

Let’s create Curves Adjustment Layer again. Make sure it was under Hue/Saturation Layer.

Click the RGB and Change it to Blue.

In order to remove the blue cast, let’s push down the blue curve a little until the blue casts turns into yellow. 

You can now delete our Hue/Saturation layer guide.

And that’s how it’s done.

5. Whiten Ceiling

To whiten the ceiling, we need to Path it first, To path the ceiling we need to use the Pen Tool or just press (P)

Before pathing, let’s duplicate & merge all the layers first.

Select the top layer that is visible and HOLD (CTRL+ ALT+SHIFT +E) or (OPTION+COMMAND+SHIFT+E)

Let’s path the ceiling by clicking all the sides.

and then right-click on your mouse or trackpad.

Choose Make Selection.

After making a selection create a Hue/Saturation Layer

Adjust Lightness from +20 to +50

Saturation to -20 to -30.

Adjust depending on how light and how saturated you want the ceiling.

5. Add Window View

Let’s turn on the Window layer by clicking the Eye Icon.

To change the window view, we need to Path (P) the window.

Just like ceiling, let’s select the edges.

window pathing

and then right-click on your mouse or trackpad.

Choose Make Selection. Input a Feather Radius 1 px.

We don’t want them to be seen in window’s metal frames so we have to delete it.

Go to Brush (B)

Right click and change the Brush Hardness to 80%

Make sure that the brush color is black and opacity is 100%

Let’s change the brush size according to the width of the metal frame.

brush settings photoshop

To remove the excess frames, click the alpha mask of the layer. 

Hold shift and click the start and end point of the line.

Tada!

alpha mask
shift click photoshop

We are almost done

Save File – before we proceed to the last part of our project let’s have a quick save on our progress.

Save a Photoshop format (.PSD) in case you have some revisions or you need to add something on your file.

5. Align & Sharpen

Before we save our final file or the JPEG file. Let’s align the photo one more time.

Let’s flatten the image by right-clicking the layer window, and select Flatten Image.

Open Camera Raw by HOLDING (CTRL+SHIFT+A) for PC and (COMMAND+SHIFT+A) for MAC

Go to Geometry

Choose 4th option to straighten all the verticals.

To sharpen the image, let’s go to the Details in Camera Raw.

Push the sharpness option according to your taste. 


Last is to hit Okay and save your JPEG file (Ctrl/Command+Shift+S).

And we’re done!

In conclusion, achieving stunning real estate photos demands more than just a camera and some basic editing skills. It requires a sharp eye, meticulous attention to detail, and the right tools at your disposal. Fortunately, by following the expert tips and techniques we’ve provided, you can elevate your real estate photos to a whole new level and leave the competition in the dust.


But what if the thought of editing your real estate photos feels overwhelming and stressful? Fear not, for our team at Omorfia is here to help. With our unrivaled expertise in real estate photo editing, we can turn your ordinary photos into true works of art. Our experienced photo editors utilize cutting-edge techniques and tools to ensure that your photos look their absolute best, giving you more time and freedom to focus on other critical aspects of your real estate business.


Don’t let mediocre real estate photos hold you back any longer. Contact Omorfia today and let us transform your photos into masterpieces that will dazzle your clients and leave a lasting impression.

READ MORE


Few Tips To Make Your Listing Standout

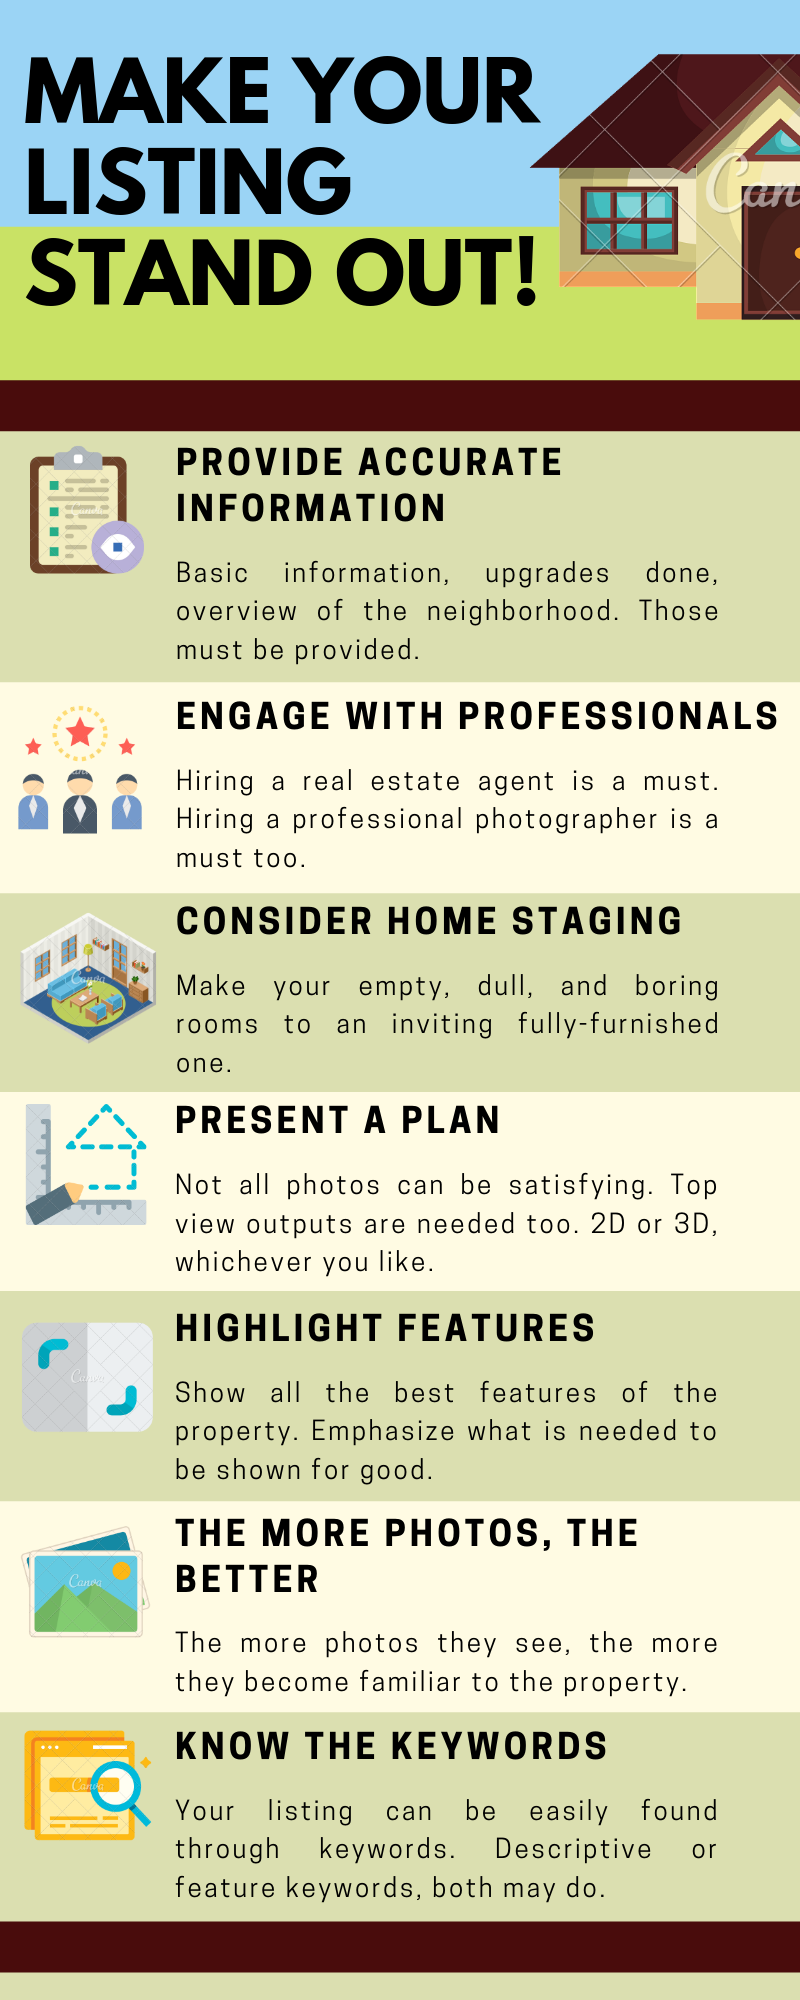
We summarized the article “7 Tips To Make Your Listing Standout” into an infographics. Yep! Because most of us doesn’t have the time to read a 900-word article.


tips for real estate infographic

READ MORE