What is Real Estate Photo Editing? (Image Retouching 101)
What Is Real Estate Photo Editing?

By JED ALMONIDOVAR
One of the most important parts of capturing property photos is the work that happens after the shoot. Real estate photo editing is a way that can help you adjust the properties that you’ve shot. It’s a way to enhance your photos.
Real estate photo editing is not an option anymore. It is necessary since real estate photographers are now using digital cameras that’s why its the best time to make the most out of it.
Let’s get started.
What is Real Estate Photo Editing?
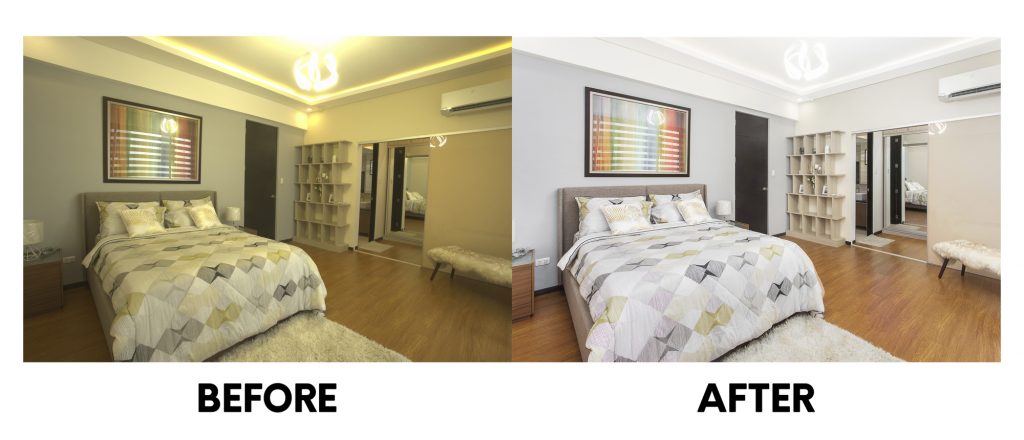
Real estate photo editing is defined as the act of adjusting an image using photo editing software, to simply put. But that’s oversimplifying a subject which is quite complex.
Other terms for real estate photo editing:
Real estate Image editing
Real estate photo retouching
Real estate image retouching
What software or program can you use to edit real estate photos?
A simple google search will show hundreds of apps and photo editing softwares. What most professionals are using include Adobe Photoshop, Lightroom, and Camera Raw.
Adobe Photoshop – If you’re going to work with layers of photos, this is the right software for you. You can make the impossible possible here such as Manual Blending and Photo Manipulation.
Lightroom – is more of an adjustment than editing. You cannot alter photos here, unlike in Photoshop. If you want to batch process your photos, this is the right software for you.
Camera Raw – is almost the same as Lightroom but more basic.
What are the types of real estate photo editing?
We categorized real estate photo editing into 4 types.
HDR, Manual Blending, Manipulation, and Adjustments.
HDR is the way of blending photos automatically using a program or software such as Adobe Lightroom, Enfuse, Photomatix, and many more. What it does is that it reproduces a greater dynamic range of luminosity than what is possible with standard digital imaging or photographic techniques by combining multiple different exposures.
Manual Blending is almost the same as HDR but with more detailed blending. In manual blending, you have more freedom to adjust your photos where you could also blend ambient and flash photos.
Manipulation is a post-process technique that can’t be done or will take too much time during a shoot such as:
replacing the skies,
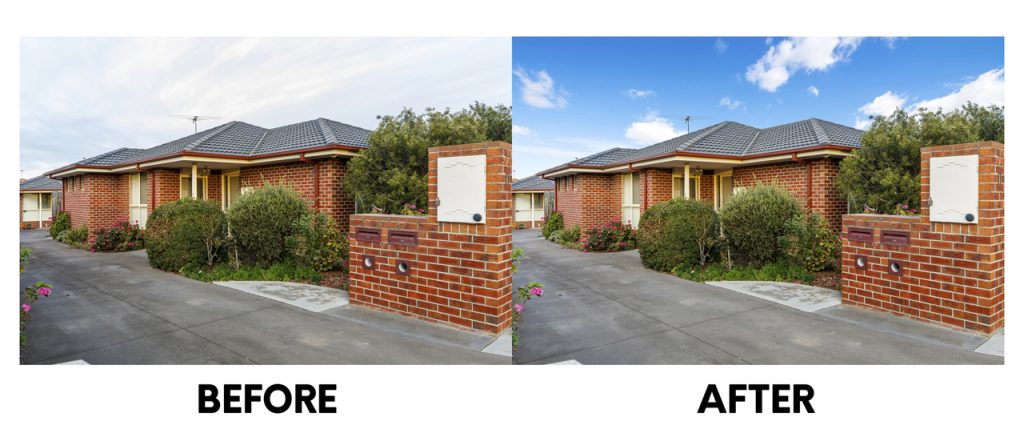
removing unnecessary objects, enhancing lawns, and pool,
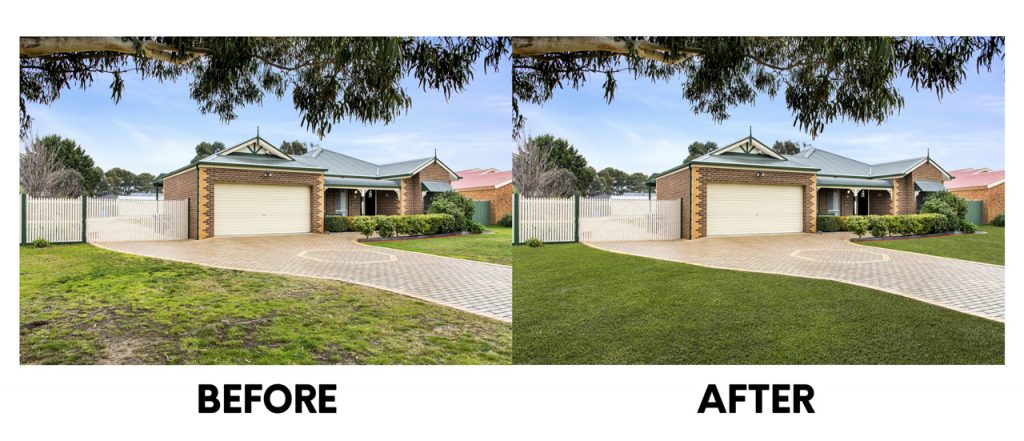
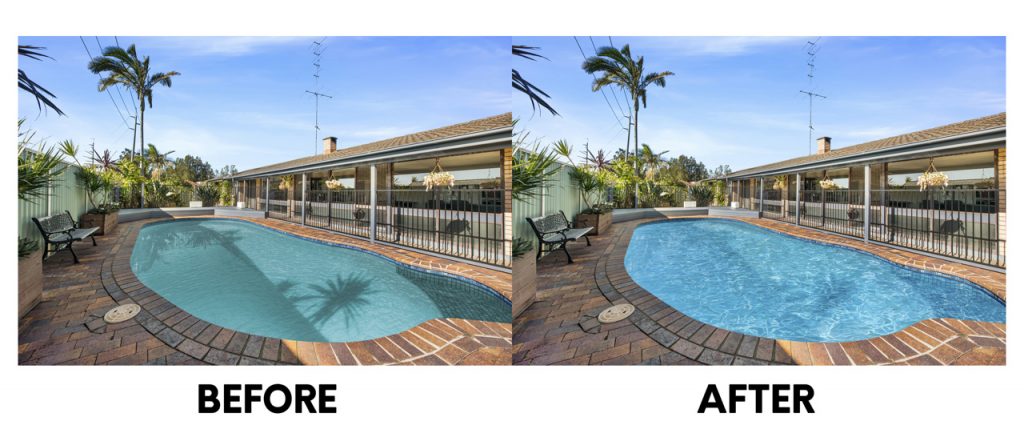
insert tv screens and fires in the fireplace.
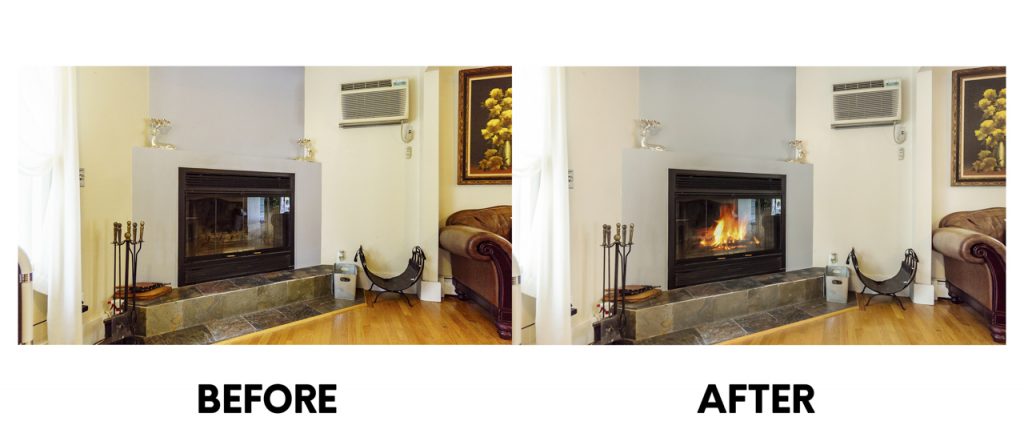
This can be done in the post-process using editing software such as Adobe Photoshop.
Adjustments – are the way to enhance your photos. It’s a minor change that can make a major impact on your photos. This can be done by using a variety of software. The one we are familiar with is Camera Raw from Photoshop and Lightroom. Here are some examples of adjustments.
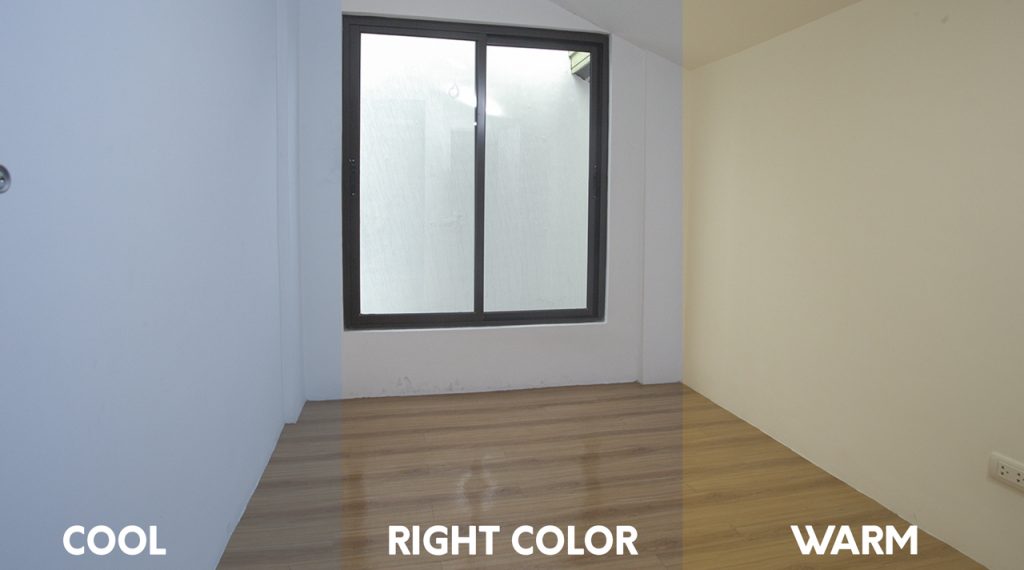
White Balance – This is an adjustment to make the photo cool or warm in color. From the word white balance, we need to make the white, white. The correct usage of this is to make the picture the same as the actual room.
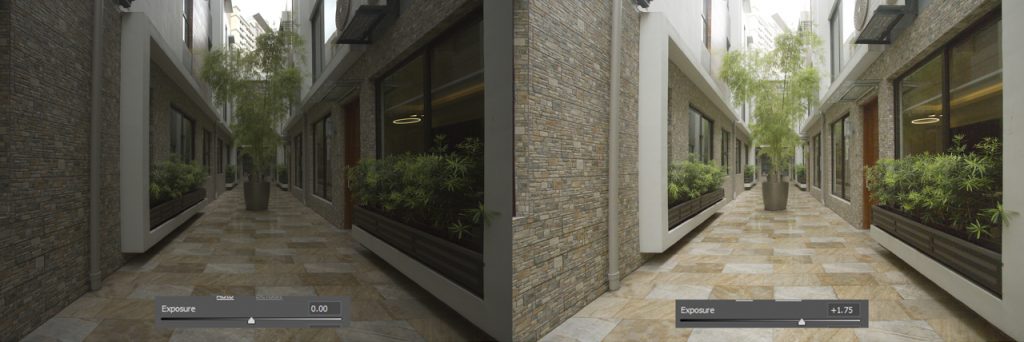
Exposure – is an adjustment to change the lightness of an image. We use this if we want to darken a bright image or lighten a dark image.
Contrast – It has a huge effect on photo editing, it can make the photo look soft if its contrast is low then makes it more intense if it’s high. Also, the blacks and whites of the photo are more likely to be seen with the help of contrast.

Highlights – It is normally the bright point in the photo. It is ideal to lessen the highlights a little to see more details of each photo.
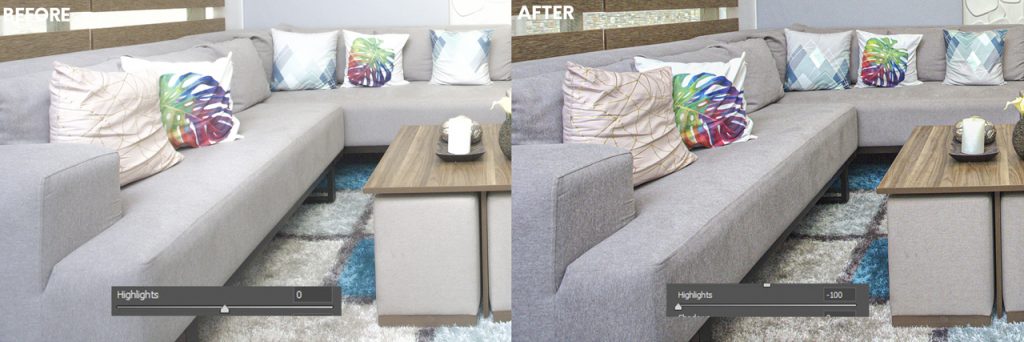
Shadows – As the opposite of highlights, shadows refers to the dark points in the photo. It is usually rendered in black tonal values but its details can still be seen when adjusted. You should be aware that good use of shadows can create good quality and realistic photos.
Saturation – This pertains to the intensity of color in photos. The lower the saturation the more it becomes gray or colorless. The higher the saturation the more it becomes vivid. The photos must always be on its natural look, not over-saturated and not desaturated, just a balanced saturation of every photo.

Tip: Reduce saturation whenever you increase contrasts because contrasts add saturation in a photo.
Did I miss anything? Let me know in the comments.
