How To Create A Floor Plan Sketch

How To Create A Floor Plan Sketch

Real Estate Photographers’ job is to take good photos of a certain property. But doesn’t end with that. Sometimes, they also provide other services like Virtual Staging and Floor Plan Designing.

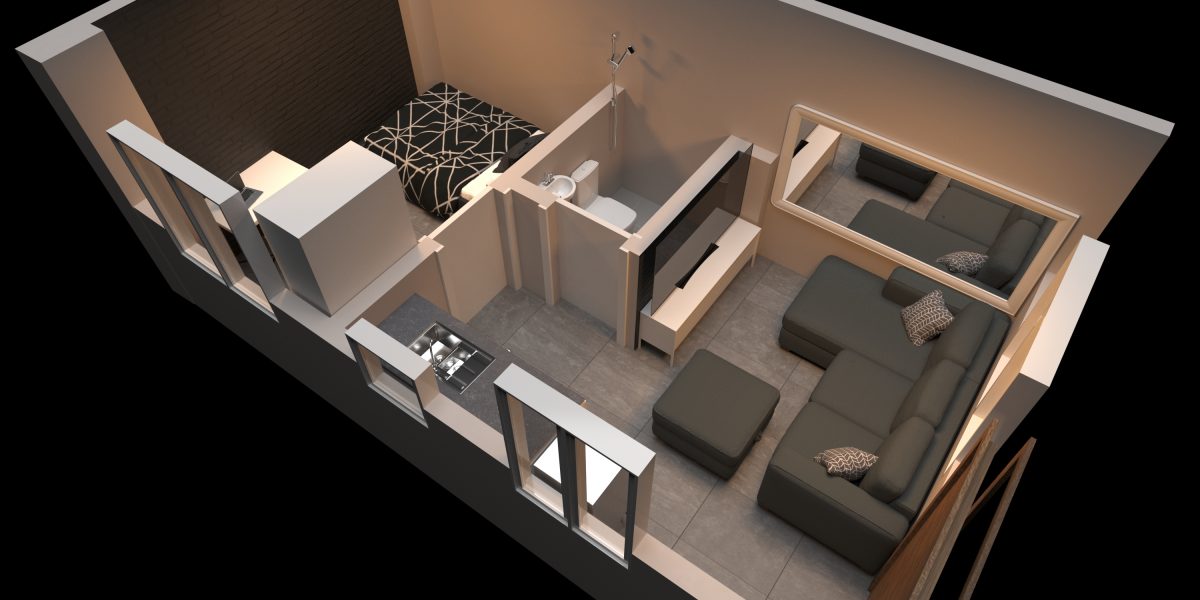
small 3d floor plan

A floor plan is an essential nowadays. Most of the property buyers requires or are looking forward to see floor plans together with the photos captured by real estate photographers. Unlike Virtual Staging, Floor Plan Designing is more complicated to do since you have to provide a sketch first and enhance it digitally.

This article is written to provide tips for the real estate photographers in drawing or sketching a certain plan. To draw a floor plan, you have to:

Bring necessary tools for measuring: 

Measuring tools, pens, and paper.

No specific paper is required for you to sketch a floor plan. You should choose ei

ther graphing paper, or any ordinary bond paper. It’s just that, it’s more convenient to use a graphing paper rather than a plain bond paper. Same with the pen – no specific pen is required, but it’s better to use a multi-colored pen for clarity. Just assign a certain color for the walls, and dimensions. For the measuring tool, there are three types. The first and the most used is a tape measure. This is mostly used for measuring short to medium range distances. Tape measures available  in the market has the length of 3 meters, 5 meters, and 10 meters. The second one is a measuring wheel. This a much longer than the tape measure. This can probably measure even a hundred-meter distance. This is recommended in measuring sites, and other long distances. The third is the laser meter. This has been a trend since the technology rises. Many people prefer using this tool because it is a lot easier and faster to use, and this is also handy. Laser meter comes with an electrical one, and a battery-operated one. You choose what is more convenient for you to use.

Start measuring and layouting.


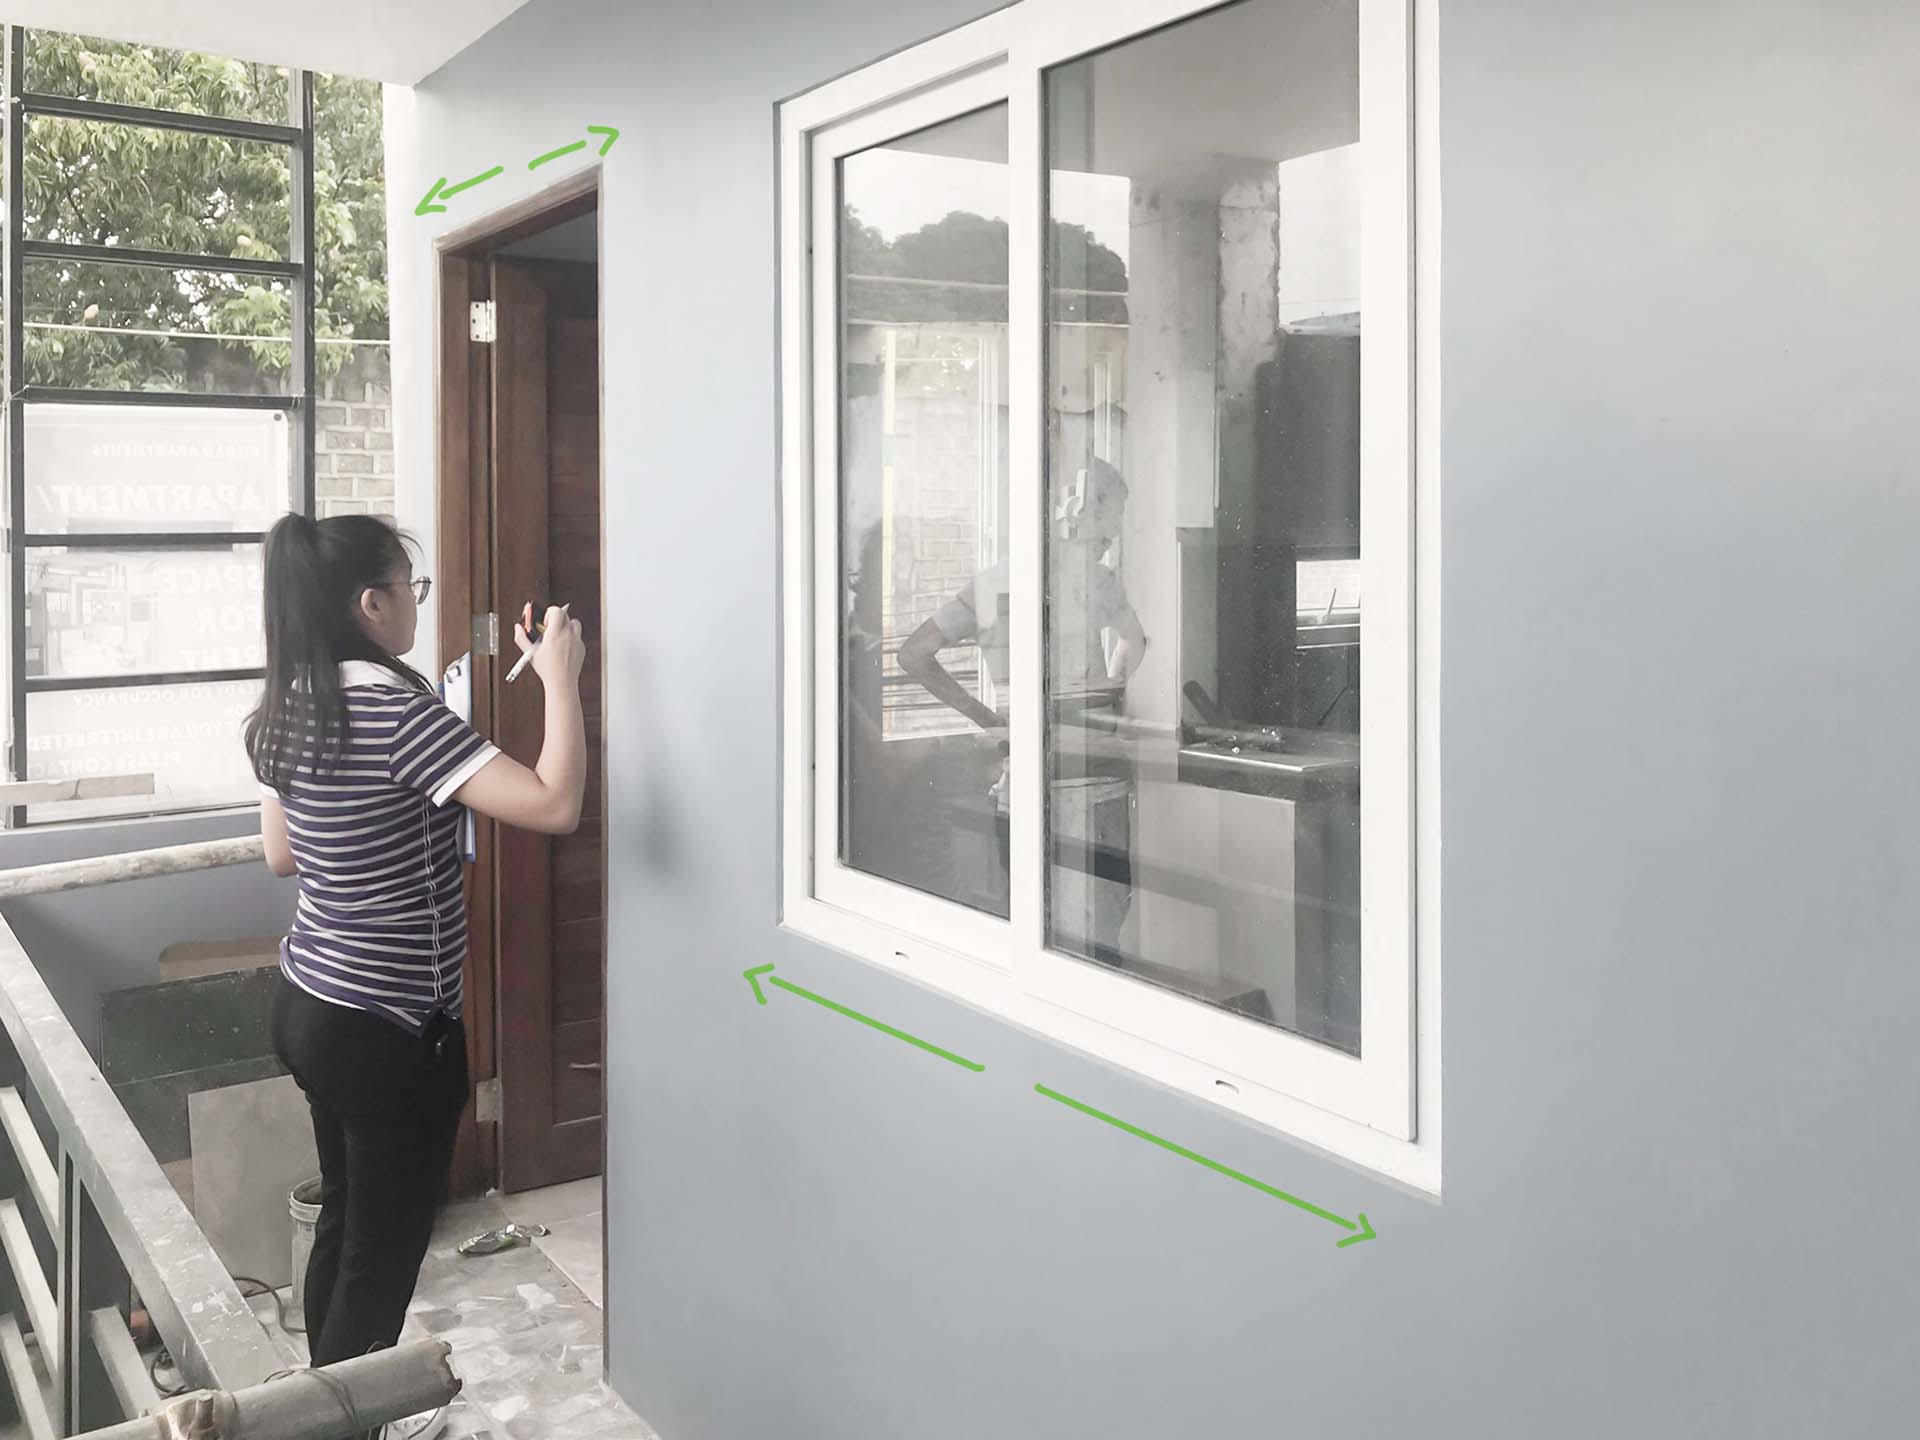
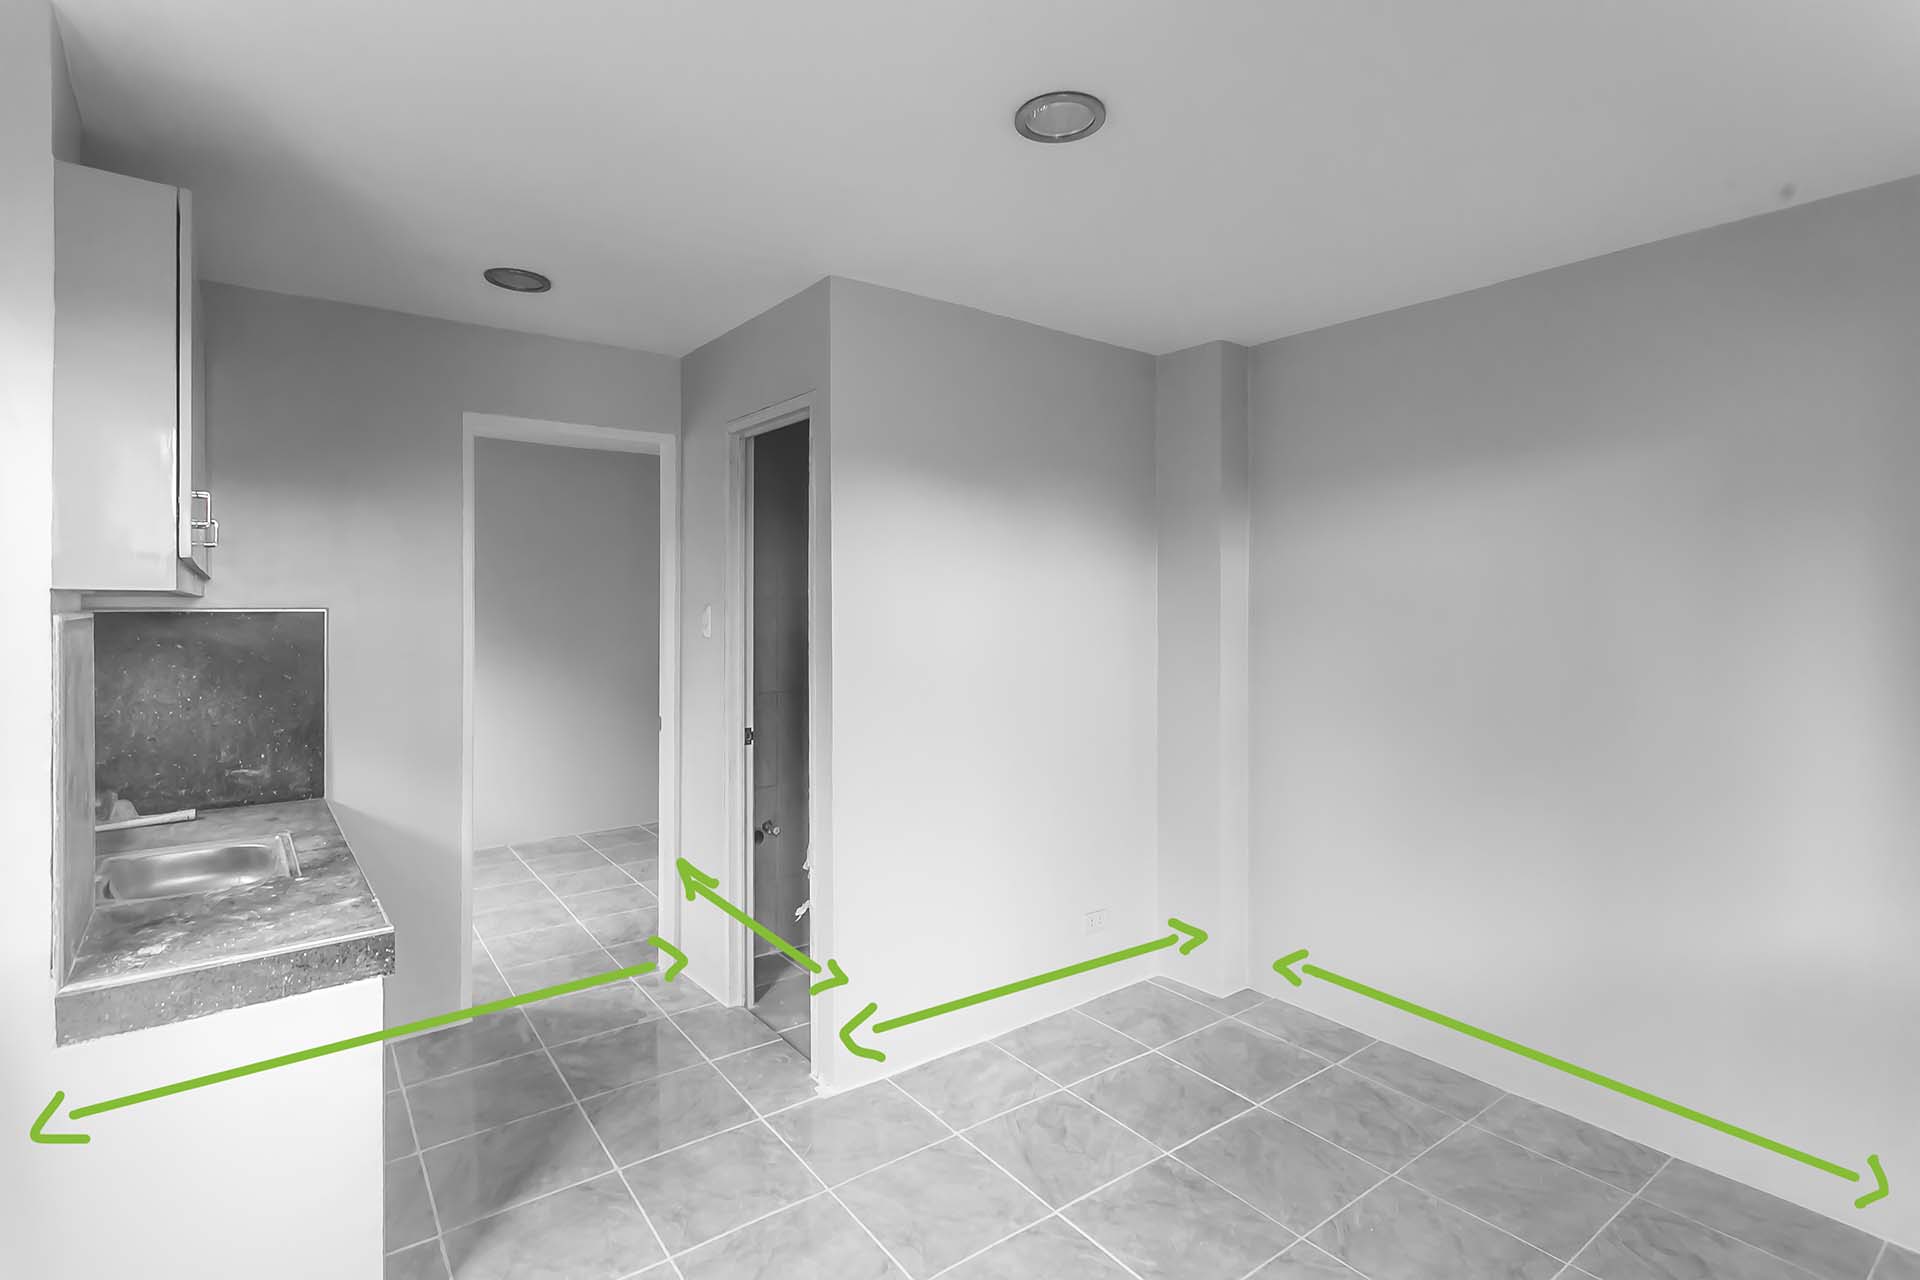
Start measuring and layouting the walls where your main entry is located. After measuring the walls, also measure and layout the doors and windows for the accuracy of its location in the plan. Second to measure is the room next to it, then just continue up until the last room. After finishing all the room in the property’s interior, measure the remaining spaces in the exterior. 


If you are to use a graphing paper, assume that per grid is measured as 1 meter or 1 foot. But it still depends on the scale of the property you are measuring. You can use 0.20-0.50 meters per grid for bigger distances, or 2-5 meters per grid for smaller distances, as mentioned, depending on your choice of scale.


Enhance it digitally.

 
 After sketching, what will happen next? Are you going to use software available online or hire a professional to do it? If yes, who are you going to hire? Who will be enhancing your sketches? Some real estate outsourcing companies have floor plan designing services, they may help, for a very affordable cost.

If you are to draw on your own or use some “do your own plan” applications found online, it is a lot easier than the manual way, but it is better to hire someone who is actually having the knowledge to edit such, because:

  1. Professionals have great understanding in the property. They may be able to provide you your specific requests if you asked for it. They can also give you a better design of the building, depending on the style you want.

  2. It is cheaper. Applications found are usually sold or paid monthly, or annually.

  3. It is not time consuming. You may have more time for yourself, and your other work to do

 
Facebook
Twitter
LinkedIn
Pinterest
READ MORE


How To Shoot Flambient In Real Estate Photography

How To Shoot Flambient In Real Estate Photography 2023

Today I’m going to show you how exactly we shoot properties. With more than 7 years of experience in real estate photo editing and 5 years in real estate photography, this is the same process that helped me expand my business from 1 person into a team of 19.

Let’s get started.

THE FLAMBIENT technique

What is flambient photography? Flambient is a shooting method in photography that mostly used by real estate photographers. It involves combining both flash and ambient light exposures by using editing software. The one we know of is Adobe Photoshop.

There’s a lot of discussions about whether you should use a flash in real estate photography or just use natural lighting. It’s just a matter of preference. However, most of the time, the real estate agents prefer to see all the details in each room such as the exact wall color, floor textures, window view,  and more. And that’s when you should use a flash.
Even when we’re using flash, we want to make sure that our photos still look natural and raw but how can we do that? If you are trying to produce this kind of look or a certain style, flash and ambient or flambient is the way to go. Try this guide into your shoot and you’ll see a big difference in your photos and you might attract more clients. Here’s how you can achieve it:

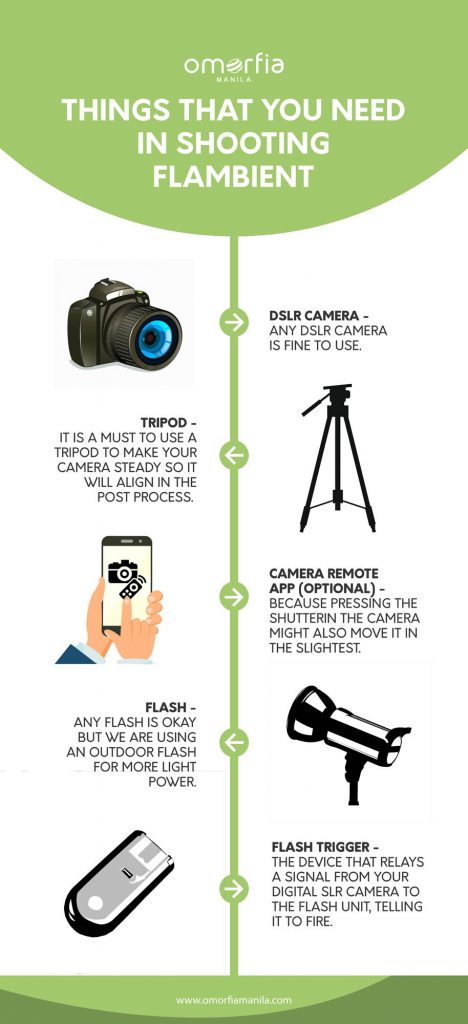
What You Need:

DSLR Camera – any DSLR camera is fine to use.

Tripod – In shooting real estate, specifically, if you want to shoot flambient, it is a must to use a tripod to make your camera steady so it will align in the post process.

Camera Remote App (Optional) – We are also using a camera remote app installed on our smartphone so we can release the shutter remotely because pressing the shutter in the camera might also move it in the slightest.

Flash – Any flash is okay but we are using an outdoor flash for more light power.

Godox AD200 is the most commonly used by photographers.


Flash Trigger – This is the device that relays a signal from your digital SLR camera to the flash unit, telling it to fire.

Do you have all those pieces of equipment? It’s time to learn how it’s done.

Step By Step Guide: How To Shoot Flambient


1) Use Ambient Bracketed Shots

Ambient light means that the light is already present in a scene. It usually refers to natural light, either outdoors or coming through windows, etc. It can also mean artificial lights such as normal room lights or in our term, no flash.

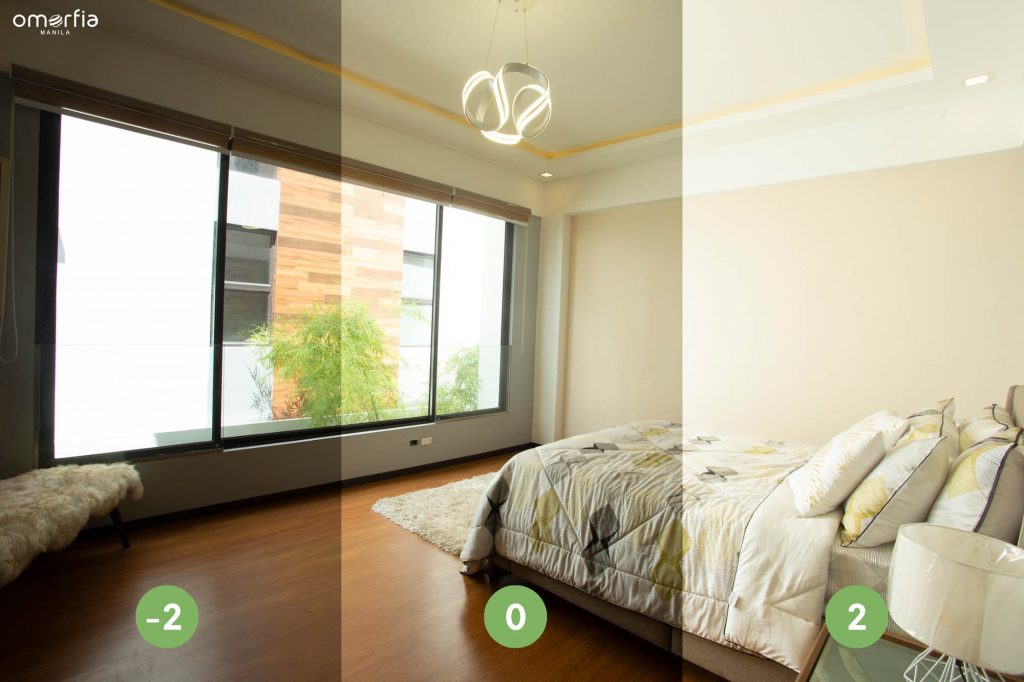
Shooting one ambient exposure is a hit or miss. Sometimes it will work just fine but sometimes it doesn’t. That’s why we recommend shooting 3-5 exposures. By using multiple exposures or bracketed shots like EV -2, 0, +2 will help you to get rid of the noise in the dark spots and recover the details to the full-blown areas


It also helps in balancing the lighting in a high contrast area by merging it in HDR software such as Enfuse, Photomatix, Photoshop.


2) Use Flash Exposure

A flash is used in photography to help illuminate a scene and to illuminate darker areas. Other uses are capturing quickly moving objects or changing the quality of light. In flambient photography, we recommend using an outdoor studio flash especially when you are shooting a large property. What we’re using is a 600w outdoor wireless flash.

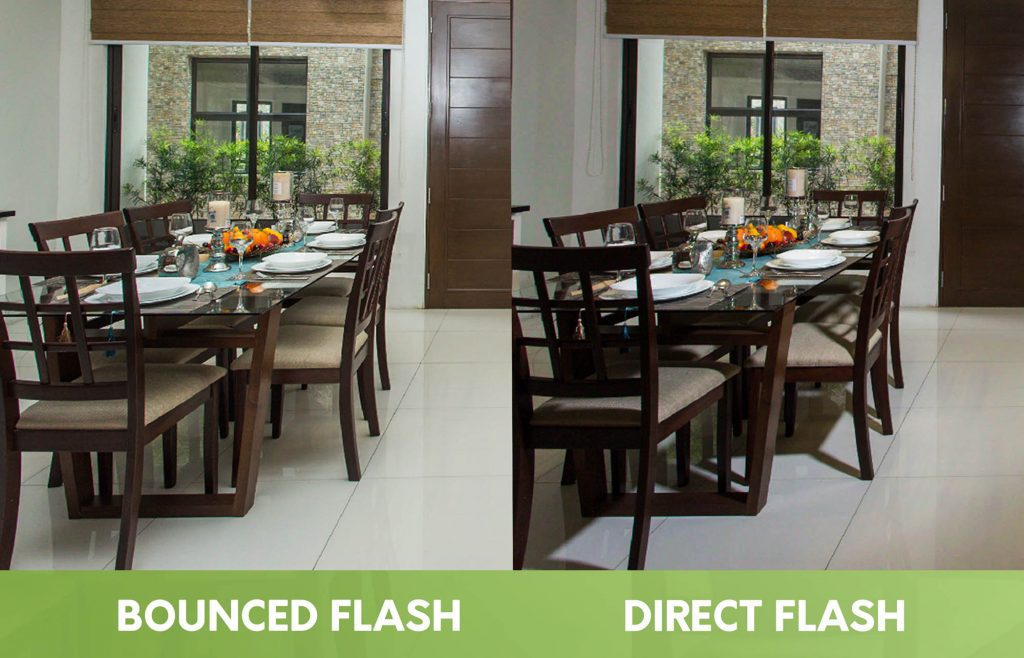
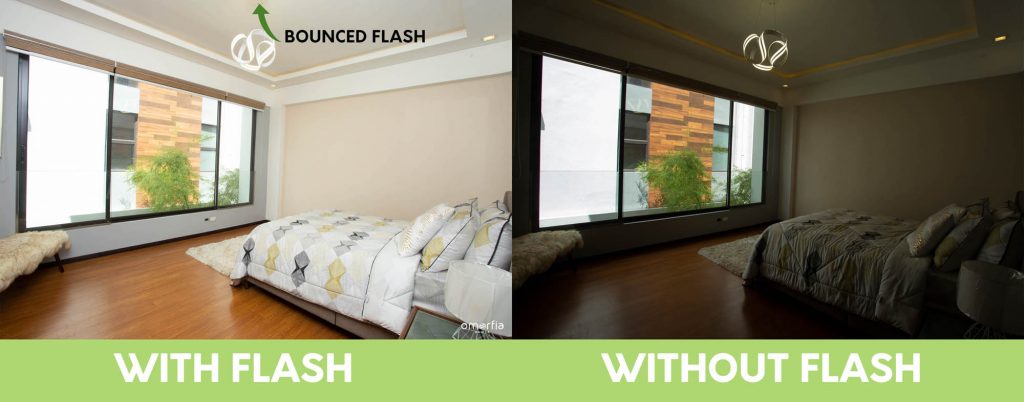
To produce a good flash exposure you should bounce the flash into the ceiling.
Bounced flash is the secret of using flash exposure (Well, not that secret, but it’s so basic that most of us forgot to apply it).

We don’t want to hit the room directly with flash because it will create horrible and harsh photos, it will also create hard shadows that are hard to get rid of.

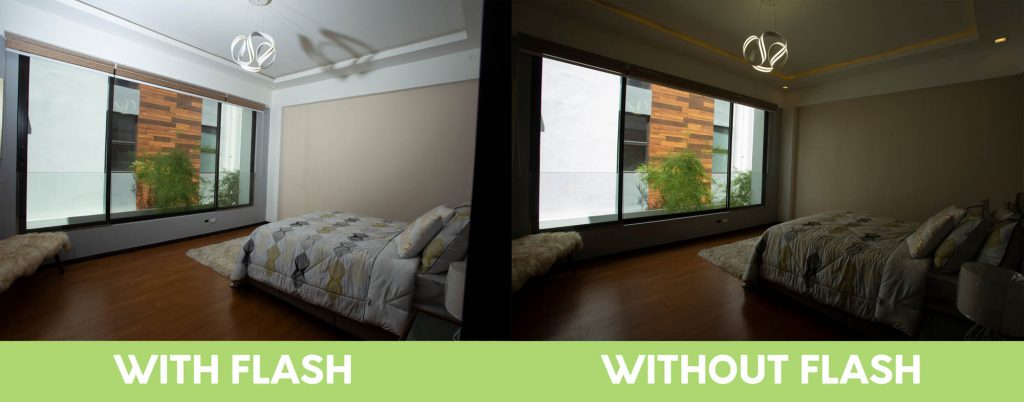
There are two ways you could do, you could point the flash in the ceiling or use a studio umbrella to bounce off the flash. Note: using an umbrella might bring a little inconvenience because you always have to move it when shooting a property. The power of the flash depends on the window exposure. Adjust the power of flash until the whole area is perfectly balanced. See the pictures below.


This is done with the same camera settings. All of the lights coming through is from bounced flash.

3) Window Exposure

There are two types of window exposure: Ambient and Flash

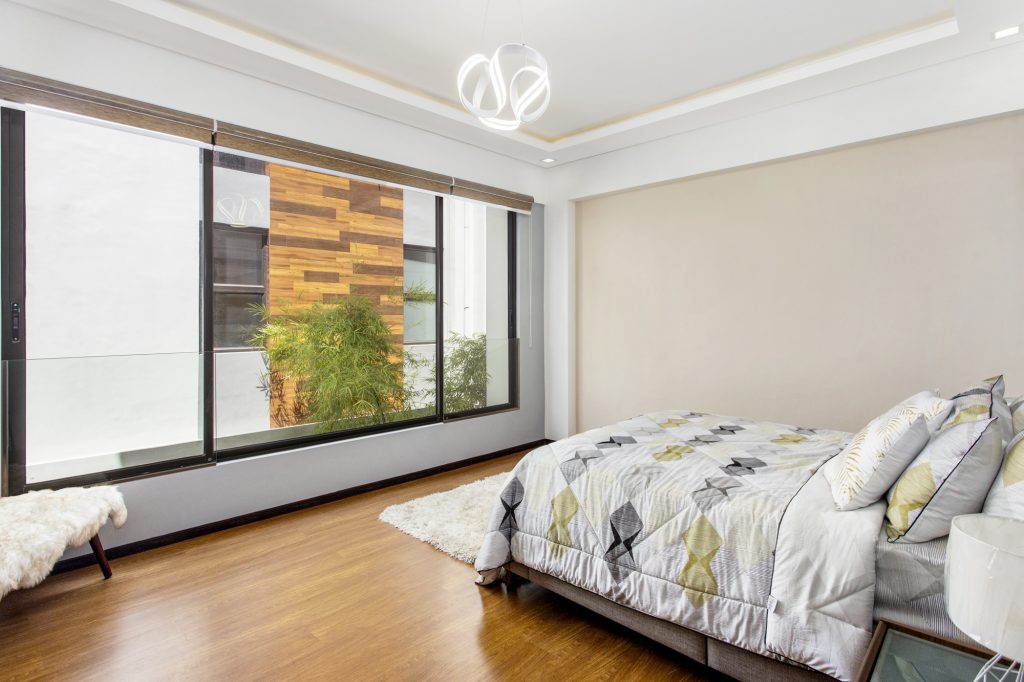
Most of the time, -2 EV exposure is not enough to capture the right exposure of the view in the window that is why it is ideal to set aside a few seconds to adjust the exposure of your camera settings until the window is well-lit. See pictures for example.

What is the difference between Ambient Window Exposure and Flash Window Exposure? Not that much since the window will just be cropped in the post process, however, there will be a huge difference in the time of editing. Most of the time, there will be visible black lines in the window exposure without flash when cropped out. You can get rid of it by using flash. You can avoid flash reflections by hiding the flash to the window and not positioning it in the same area of the window.

4) Blending the Flambient

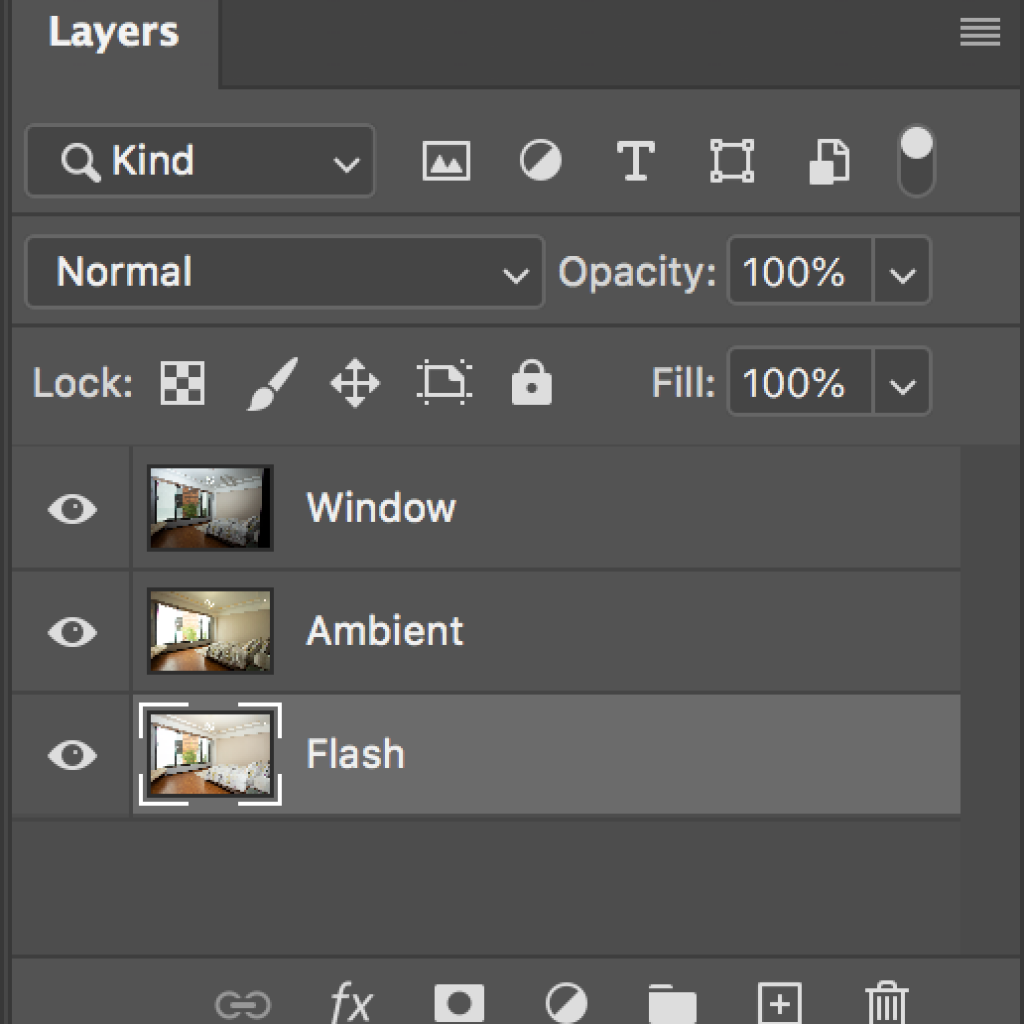
This is where it will get tricky. Blend all the exposures in Photoshop by combining the photos into photoshop layers. You can use HDR software to merge and balance all the ambient exposures before blending it with flash exposure. We just released a blog on how to edit flambient photos.

How to Edit Real Estate Photos


You can also check out this video. Nathan Cool Photo did a very good job teaching on how to do this.

This process is the hardest part. It takes a lot of time and effort to master. We recommend hiring an expert in the real estate photo editing for this kind of procedure. You will save a lot of time and money. Most of them charge as cheap as $1.2/photo.

If you are looking for an editor, Omorfia can give you a free trial.


Did I miss anything? Let me know in the comments.

READ MORE


WHY INCLUDE FLOOR PLAN IN YOUR REAL ESTATE PHOTOGRAPHY SERVICES?

1 in 4 buyers said a floor plan was necessary to grab the buyer’s attention; they would “completely ignore” the listing otherwise. Also, Floor Plan is the 3rd most important feature in your listings.

Photos alone may help capture a buyer’s attention, but a floor plan will keep their attention for a longer period of time. The more visuals you can provide to buyers, the more time they will spend looking at the listing. Making the effort to obtain a floor plan also sends a message to buyers that you are professional and thorough, and that the homeowners are serious about selling.

The most important distinction between floor plans and photos is a floor plan’s ability to showcase how a buyer will move through a home. With pictures alone, a buyer may be left with questions: What rooms have access to the backyard? How open is the kitchen? Which bedrooms connect to which bathrooms? A floor plan will answer all of those questions and give buyers a better idea of the size, flow, and space within your home.

Photos alone may help to capture a buyer’s attention, but a floor plan will keep their attention for a longer period of time. The more visuals you can provide to buyers, the more time they will spend looking at the listing. Making the effort to obtain a floor plan also sends a message to buyers that you are professional and thorough, and that the homeowners are serious about selling.

Companies from different countries that offer Image Retouching from Real Estate Photographers also offer Floor Plan Design Services, just like Omorfia. Omorfia is based in the Philippines, and now offers both Image Retouching and Floor Plan Designing, and also Virtual Staging. Outputs they came up with has amazing quality, and also offered in a very affordable price.

2d floor plan texture floor plan

READ MORE